Are you tired of missing important form submissions or constantly forwarding them to your team members?
What if there was an easier way to ensure everyone gets notified instantly, without any extra effort? With Bit Form, you can send form submission notifications to multiple recipients automatically, it will save you time and improve team efficiency.
This will help your team be informed, ensure that no leads or questions are missed, and save you from doing extra work. In this guide, I will tell you why this is helpful, what are the biggest advantages, and step by step how you can easily set it up with Bit Form. Let’s get started!
Table of Contents
🔔Why Send Notifications to Multiple People?
Keeping your customers informed quickly is important for maintaining a good reputation. Let’s say you have a business and a support team of 6 people. You have a support form on your website. When a customer fills out the form, one of your team members will get an email notification.
If that email is sent to only one busy person who can’t get back quickly, it harms your business reputation. Whenever responses are slow, customers feel ignored.
To avoid this, you can send the inquiry to multiple team members at the same time. This way, the entire support team gets the request, and someone who is available can respond immediately. It keeps everyone informed, helps your team work faster, and ensures things run smoothly without delays. It’s a simple change that keeps your support system responsive and your customers happy.
📈Benefits of Sending Notifications to Multiple Recipients
Utilizing Bit Form to send notifications to multiple recipients not only simplifies communication but also enhances operational workflows by:
Team Cooperation: When they receive notifications together at the same time, the team can cooperate without hassle and can fix issues without wasting any time.
Customization: Different options for the customization of notification emails according to the recipients or departments.
Save Time: Forget forwarding emails or doubling up on tasks. Automated notifications take care of repetitive tasks.
Quick Responses: Fast updates mean happy customers and less waiting around.
Keep Things Simple: One form that informs everybody who needs to know will make an office run much more smoothly.
Automation: Set up once and forget; the system handles the rest, saving time and reducing workload.
Integration: You can integrate with a variety of platforms, ensuring compatibility and extending functionality.
📒Guide to Sending Notifications to Multiple Recipients
Bit Form is one of those excellent plugins that will help you build forms in WordPress. It is easy, effective, and seamlessly integrates with other tools that you are perhaps already using. Here is how you can get started with the plugin:
Step 1: Install and Activate Bit Form
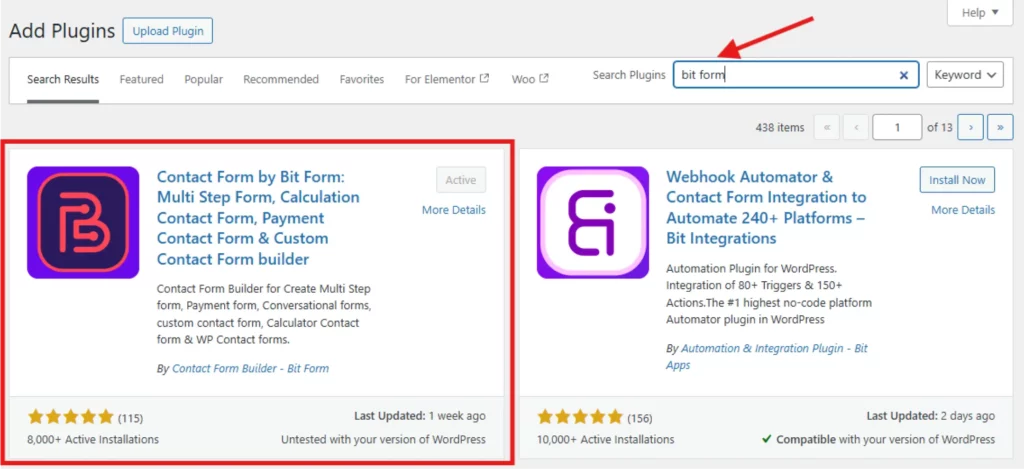
To get started with Bit Form, log in to your WordPress dashboard, navigate to the ‘Plugins’ tab on the left, and click on ‘Add New.’
In the search box, write ‘Bit Form.’ As soon as it comes up in the search results, click ‘Install Now.’ and then, click ‘Activate.’ That’s it! The Bit Form is ready to work on your website.
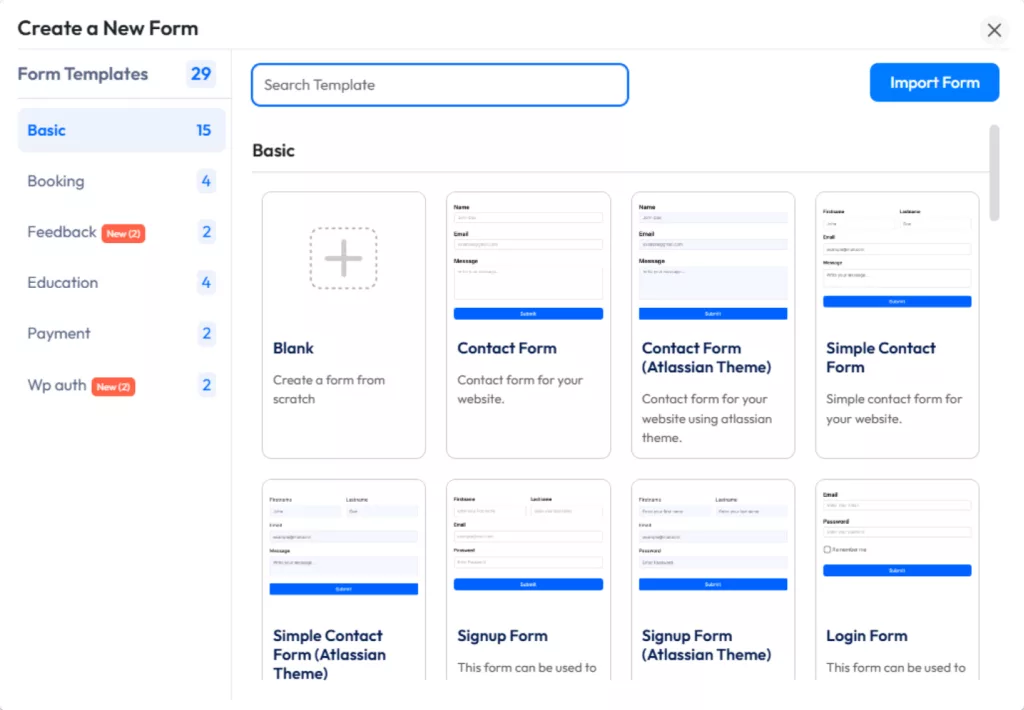
Step 2: Create Your Form
In the WordPress dashboard, select ‘Bit Form’ and click ‘Add New Form’. Then simply customize your form as per your needs with the easy drag-and-drop form builder.
You can easily add fields according to your preferences and adjust the layout to make it fit perfectly with your site.
Step 3: Configure Your Form’s Notification Settings
Once your form is complete, click the ‘Settings’ tab and select ‘Conditional Logic’. Click on the down arrow and you will see the Email Notification Checkbox.
Click on the checkbox, and you will see the option for email notifications.
You can set up how to send email notifications: customize the email recipient, the subject line, and the message. It allows you to control how and when you will be informed that someone has submitted a form.
💡Pro Tips: Pick your email template. This is how the email looks. You have to choose an email template that you have made previously. If you don’t have a pre-made email template you can create email templates easily by following this guide.
Step 4: Add Multiple Email Recipients
In the ‘To’ field of the notification setup, enter the email addresses of the recipients who should receive the form submissions.
ℹ️ If your form includes an email field, it will show up under “Form Fields.” To send the email to your WordPress users, select an option from the “WP Emails” section.
Alternatively, you can manually enter any email address. If many people are to be notified, just add the email addresses and hit enter and all persons mentioned will receive notification of the form submission.
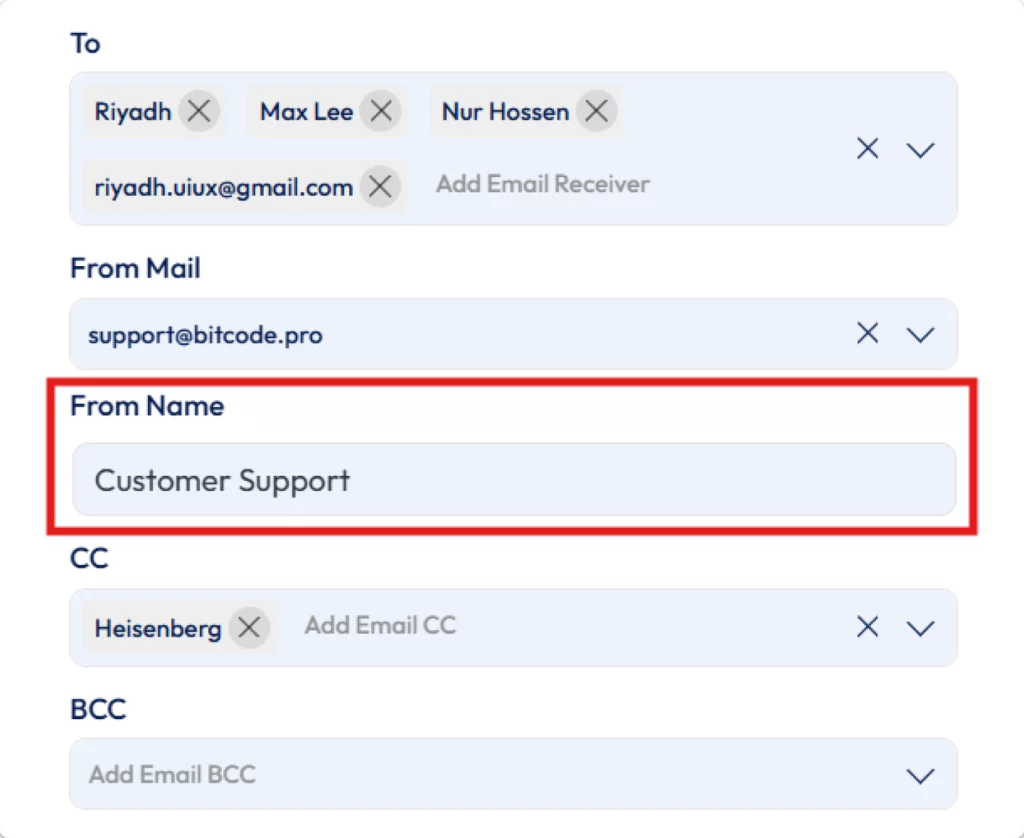
Choose “From Mail” to set the sender’s email. You can pick an email from your form, a WordPress user, or enter your email manually. This will appear in the “From” field of the notification.
Enter your “From Name.” This is the name that will appear as the sender of the email. Choose “CC” to add extra recipients. Multiple addresses can be added, and they will all receive a copy.
Choose “Reply To” to set the email for replies. You can select an email from your form, choose a WordPress user email, or enter one manually.
Step 5: Test Your Notification
Before going live, it’s a good idea to send a test email by doing some test submissions. so that you make sure all recipients receive the notification as you expected.
A test is also a way to confirm that everything works perfectly and just right in the email. It’s an easy step to make sure things run smoothly before receiving real submissions.
Step 6: Save and Publish Your Form
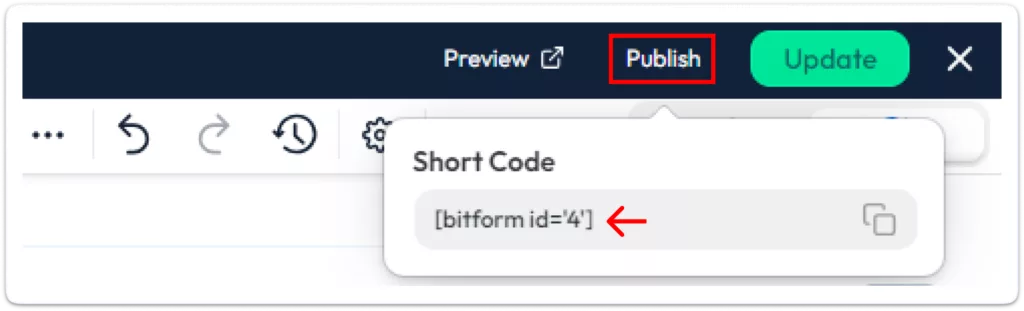
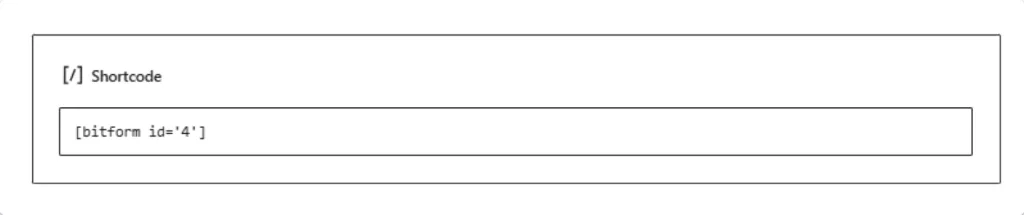
Use the Bit Form shortcode to add your form to any WordPress page, post, or on your sidebar. Preview and test to make sure it works well!
You will get the shortcode by clicking on the “Publish” button.
Now paste the shortcode wherever you want to show the form.
Bringing Bit Form into your workflow means less worrying about missed emails and more time for your team to focus on what they do best. It makes communication faster, clearer, and easier, so everyone stays on the same page.
Simply follow the above steps, try features around in Bit Form, and you will find out how easy it’s going to be to connect with potential customers. Check out theintegrations that Bit Form offers to see how they can help you get more people to your site and better handle their information.
Want to make it easier for your team to talk? Try Bit Form and see how easy it can be when information moves smoothly. Join the many teams already using Bit Form to improve their communication and get better results.
He writes about WordPress, SEO, automation, and SaaS with hands-on experience. He creates tutorials, comparisons, and practical content by understanding real use cases, search intent, and AI visibility.
Many WordPress users need to change their admin email for different reasons. Sometimes you lose access to your old email. Sometimes it gets hacked. And when that happens, you stop receiving important emails, like password reset links, security alerts, or update notifications. That can be a big problem. Another common reason is switching to a […]
WPForms Lite users often face a common problem. The free version does not store form entries in the dashboard. Instead, it only sends submissions by email. This means you cannot view or manage entries inside WordPress. This setup can quickly become frustrating. Important emails may land in spam or get lost. Without upgrading to Pro, […]
AI is changing how WordPress websites create content and automate daily tasks. But many website owners still struggle to connect powerful AI tools without paying extra or dealing with complex setups. While many creators are still stuck in the “copy-paste” loop with AI tools, WordPress Gemini Plugin is revolutionizing how websites use artificial intelligence to […]
Cookie Consent
We use cookies to improve your experience on our site. By using our site, you consent to cookies.
This website uses cookies
Websites store cookies to enhance functionality and personalise your experience. You can manage your preferences, but blocking some cookies may impact site performance and services.
Essential cookies enable basic functions and are necessary for the proper function of the website.
Name
Description
Duration
Cookie Preferences
This cookie is used to store the user's cookie consent preferences.
30 days
Cookie Preferences
This cookie is used to store the user's cookie consent preferences.
30 days
Cookie Preferences
This cookie is used to store the user's cookie consent preferences.
30 days
This cookie is set by Cloudflare to help manage bot traffic and protect the website from malicious activity. It does not collect or store any personal data and is used solely for security and performance purposes.
Used to monitor number of Google Analytics server requests
10 minutes
__utmb
Used to distinguish new sessions and visits. This cookie is set when the GA.js javascript library is loaded and there is no existing __utmb cookie. The cookie is updated every time data is sent to the Google Analytics server.
30 minutes after last activity
__utmc
Used only with old Urchin versions of Google Analytics and not with GA.js. Was used to distinguish between new sessions and visits at the end of a session.
End of session (browser)
__utmz
Contains information about the traffic source or campaign that directed user to the website. The cookie is set when the GA.js javascript is loaded and updated when data is sent to the Google Anaytics server
6 months after last activity
__utmv
Contains custom information set by the web developer via the _setCustomVar method in Google Analytics. This cookie is updated every time new data is sent to the Google Analytics server.
2 years after last activity
__utmx
Used to determine whether a user is included in an A / B or Multivariate test.
18 months
_ga
ID used to identify users
2 years
_gali
Used by Google Analytics to determine which links on a page are being clicked
30 seconds
_ga_
ID used to identify users
2 years
_gid
ID used to identify users for 24 hours after last activity
24 hours
_gat
Used to monitor number of Google Analytics server requests when using Google Tag Manager
1 minute
_gac_
Contains information related to marketing campaigns of the user. These are shared with Google AdWords / Google Ads when the Google Ads and Google Analytics accounts are linked together.
90 days
__utma
ID used to identify users and sessions
2 years after last activity
Clarity is a web analytics service that tracks and reports website traffic.