AI is changing how WordPress websites create content and automate daily tasks. But many website owners still struggle to connect powerful AI tools without paying extra or dealing with complex setups.
While many creators are still stuck in the “copy-paste” loop with AI tools, WordPress Gemini Plugin is revolutionizing how websites use artificial intelligence to enhance content, improve user experience, and automate processes.
If you’re wondering how to integrate Google Gemini AI with your WordPress site without any cost, you’re in the right place.
When Gemini AI Integrated with Bit Flows, one of the most reliable WordPress Gemini plugin in the market, you can unlock Gemini AI’s powerful capabilities for free and smoothly integrate it into your WordPress site.
In this guide, we’ll walk you through the easiest way to connect your WordPress site to Gemini AI using Bit Flows, and it’s completely free. Let’s get started!
Table of Contents
Benefits of Integrating Google Gemini AI on Your WordPress Site
Integrating Google Gemini AI with your WordPress site offers several powerful benefits. Here’s how Gemini AI can take your WordPress site to the next level:
1️⃣ Automatic Content Creation
As writers, we’ve all been there – staring at a blank screen, hoping the words will magically appear. Writer’s block can be a real challenge. In fact, Content Marketing Institute found that 67% of marketers struggle with content creation.
With Gemini AI, that frustration becomes a thing of the past. Whether you need a blog post, product description, or even a quick bullet-point summary, Gemini AI generates high-quality content instantly, so you can keep the ideas flowing without getting stuck.
2️⃣ Generating Click-Bait Meta Description
In a study by Neil Patel, he explains that click-through rates (CTR) are a key signal for Google. When more people click on your link in search results, it tells Google that your content is what users are looking for, which can help boost your rankings.
A big part of this is having well-written meta descriptions. Gemini AI can automatically generate meta titles and meta descriptions that are optimized for search engines. Gemini AI can help generate SEO-friendly meta descriptions based on best practices.
3️⃣ Efficient Research and Workflow Structuring
Gemini AI takes the headache out of research and data organization. It can quickly summarize large sets of data, extract valuable insights, and structure information in a way that makes your workflow more efficient. This is especially useful for tasks like market research or competitive analysis, where sifting through large amounts of information can be time-consuming.
By automating these repetitive tasks, Gemini AI allows you to focus on the more strategic, high-value activities that drive your business forward.
4️⃣Personalized Content Generations
Imagine visiting a website and instantly being greeted with content that matches your interests; it can be blog posts, products, or services you’re most likely to enjoy. You can generate content from users’ input using Gemini and your training data so that every visitor gets a proper explanation of their inquiries.
When combined with user data and automation workflows, Gemini AI can help generate personalized responses.
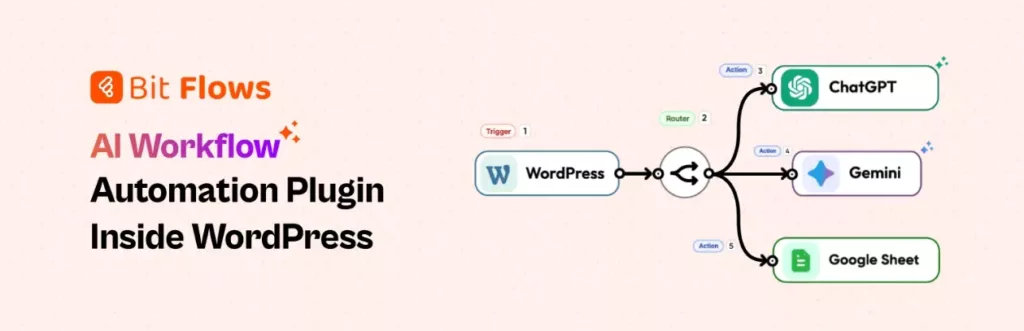
Bit Flows: Free WordPress Gemini Plugin
Bit Flows is a powerful workflow automation tool that makes it easy to connect Google Gemini AI with your WordPress site. Instead of juggling multiple plugins or writing custom code, you can build complete AI-powered workflows from one visual builder.
With Bit Flows, you can send data from forms, websites, or other apps directly to Gemini and automatically use the AI-generated output inside WordPress.
One of the biggest advantages of Bit Flows is its flexibility. You are not limited to basic tasks. You can generate blog content, create meta descriptions, summarize data, or trigger AI responses based on user submissions.
Key Features That Make Bit Flows Stand Out
Visual drag-and-drop builder for creating AI workflows easily
Free Gemini AI actions are available in the core version
Dynamic field mapping to personalize AI outputs
Advanced conditional logic for smarter automation flows
Multi-step workflow support without limits
Direct WordPress integration for automatic post creation
Detailed logs and test runs for easy debugging
Another major advantage is cost efficiency. The core automation features, including Gemini actions, are available in the free version. You can build multi-step workflows, connect your forms, and automate WordPress actions without worrying about strict usage limits.
If you want a simple and scalable way to use Gemini AI inside WordPress, Bit Flows provides a practical and beginner-friendly solution that keeps your automation fast, organized, and fully under your control.
What Is Google Gemini AI?
Google Gemini is an advanced artificial intelligence model developed by Google. It is designed to understand and generate human-like text, analyze data, and help automate a wide range of digital tasks.
With Gemini, you can quickly create blog content, write summaries, generate ideas, and process information more efficiently. It uses modern machine learning and natural language processing to deliver fast and context-aware responses.
When connected to automation tools like Bit Flows, Gemini becomes even more powerful. It can work behind the scenes to generate content, respond to user inputs, and support smarter WordPress workflows with minimal manual effort.
How to Connect Google Gemini in WordPress for Free
Let’s walk through the simple steps to connect Google Gemini with your WordPress site using Bit Flows. It’s a quick and easy process that will help you get everything set up smoothly.
In this example, we will build a simple AI automation that takes a form submission, sends the data to Gemini, automatically generates and publish blog to WordPress. This will help you see how Bit Flows can turn manual tasks into a fully automated WordPress workflow.
Step 1: Install and Activate Bit Flows
First, install Bit Flows on your WordPress site. From your WordPress admin dashboard, go to Plugins → Add New and search for “Bit Flows.” Then click Install Now and Activate.
In your WordPress dashboard, go to the “Bit Flows” menu. Click on the “Create Flow” button to create a new flow. Next, give a name for your flow (for example, “Gemini Connection”) so that you can easily find it later.
Step 3: Add a Trigger
Next, add a trigger to your flow. Click the “+” icon and search for “Bit Form.” Select the “Submit Success” trigger, which will activate the flow when a form is submitted.
Then choose the form you want to use, and then click “Listen Response,” and finally submit the form to see whether the data is being captured or not.
Step 4: Add an Action
Now, click on the “+” icon again to add an action to your flow. In the search bar, type in “Gemini” and select one of the available options, like“Create a Chat Completion”.
A new window will pop up asking you to connect your Gemini account. Click on“Add Connection.” To complete the connection, write the name of your flow, then enter your “Value”.
To get the value, go to Google AI Studio and then Create API Key. Copy the API Key and return to Bit Flows and paste it in the Value field, then click Connect.
After connecting to Gemini, the next step is to select the Gemini model you want to integrate. For this tutorial, I’ve selected models/gemini-2.5-flash. Then, enter the message you want to send to Gemini.
After clicking on Message, you’ll see two options:
Role: Choose the role you want the Gemini model to take.
Message: Write the command or message you want Gemini to perform.
If you want to include dynamic content in the message, you can easily map dynamic form fields to personalize the message further.
As you can see, I’ve written the message as the prompt, and in the prompt, I’ve included the fields so that Gemini can fetch data from those fields with every form submission.
If you want access to more advanced features, enable the “Show Advanced Features” option. Next, click on “Test Run” to check if Gemini is generating content correctly or not.
Now, when I clicked the Test Run button, the test result showed that Gemini successfully generated a blog based on the title submitted.
It also pulled the data from the fields I had specified, exactly as I mentioned. This confirms that the integration is working perfectly.
Step 05: Generating Images for the Blog with Gemini
As Gemini is generating the content perfectly, it’s time to generate an image for the blog. To do this, we’ll need another Gemini action. Simply click the+ icon on the right again, search for Gemini just like before, and you’ll see three events listed. This time, select the “Generate an Image” event.
Click on “Add connection,” and a pop-up will appear. In this pop-up, you’ll need to select the model. For generating the image for the blog, I’ve selected the Nano Banana Pro model this time. At the same time, I have given a Prompt to Gemini for generating the specific image I want.
Now select the “Test Run” to see if the Gemini is generating the image correctly or not.
Here is the output. You can see that Gemini AI is generating content in string format, which isn’t directly usable as an image. To make this work, we need to convert the Base64 string into a proper image format. For this, we’ll use the Image Helper tool of Bit Flows.
One of the standout advantages of Bit Flows is how it simplifies the integration of WordPress with Gemini or other AI tools. With Bit Flows, you can effortlessly automate tasks like image conversion that can reduce complexity and save your valuable time.
To convert the image format, simply click the + icon to add an action, go to the Tools section in Bit Flows, and select the Image Helper tool.
After selecting the Image Helper tool, you’ll notice the default Conversion Type is set to Image to Base64. Make sure to change it to Base64 to Image. Then, in the Base64 String field, enter the Data field to fetch the data from the Base64 string, ensuring the image is converted into a usable format.
Additionally, you can add a title,alternative text, and acaption for the image. The alternative text is essential for accessibility, as it describes the image for screen readers and helps improve SEO. You can also add a detailed description of the image content.
Step 06: Creating a Post with WordPress
Once everything is set up, it’s time to integrate WordPress with the flow so that the content generated by Gemini AI can be directly posted to your WordPress site.
To do this, click the + icon, search for WordPress, and select it. When you click on WordPress, you’ll see a list of events. From that list, choose the “Create New Post” event, and a pop-up will appear.
In the pop-up, enter the Post Title and map the corresponding field, which is the Title from the Form Submission that you created earlier. Then, fill in the post type, post status, post author, post category, and post tags. For Post Content, add the field “text” and move forward.
For the Post Featured Image URL, map the“url” field generated by the Image Helper tool so that your post will have the correct image.
Once you’ve completed the setup, simply click on Test Run, and that’s it! You’ll see that Gemini AI is generating both content and images accurately, all while creating a new post directly in WordPress.
This is how you can easily integrate Gemini AI with WordPress using the Gemini WordPress plugin, like Bit Flows.
Your WordPress and Gemini AI workflow is now fully live and working perfectly. Every new submission will trigger your automation exactly as planned.
From here, your AI-powered system runs in the background, saving time, reducing manual work, and keeping your content pipeline moving consistently.
Troubleshooting Common Gemini WordPress Integration Errors
If your automation is not working, don’t worry. Most problems come from small setup mistakes and can be fixed in a minute.
If the flow does not trigger, make sure you selected the correct form and clicked Listen for Response. Also, confirm that the flow is active. If Gemini fails to connect, your API key may be wrong. Create a new key in Google AI Studio and reconnect it.
If you see Base64 text instead of an image, add the Image Helper tool and set it to Base64 to Image.
AI-powered automation is quickly becoming a must-have for modern WordPress sites. If you are still handling content creation and repetitive tasks manually, you are likely wasting valuable time and missing opportunities to scale.
By connecting Google Gemini AI with Bit Flows, you can transform your WordPress workflow into a smart, automated system. From generating blog content and images to publishing posts automatically, everything can run in one streamlined flow without coding complexity.
The real advantage is control and flexibility. You decide how your AI workflows behave, what data they use, and when they trigger. And since you can start for free, there is very little barrier to testing what AI automation can do for your site.
If your goal is to work faster, reduce manual effort, and build future-ready WordPress automation, this is the perfect time to start using Bit Flows with Gemini AI and create your first intelligent workflow.
Many WordPress users need to change their admin email for different reasons. Sometimes you lose access to your old email. Sometimes it gets hacked. And when that happens, you stop receiving important emails, like password reset links, security alerts, or update notifications. That can be a big problem. Another common reason is switching to a […]
WPForms Lite users often face a common problem. The free version does not store form entries in the dashboard. Instead, it only sends submissions by email. This means you cannot view or manage entries inside WordPress. This setup can quickly become frustrating. Important emails may land in spam or get lost. Without upgrading to Pro, […]
Running a WooCommerce store is no longer just about listing products and waiting for customers to show up. Today, the WooCommerce businesses are growing through affiliate marketing, turning customers, creators, and partners into active promoters of their brand. Yet if only starting an affiliate program isn’t as simple as installing a plugin and hoping for […]
Cookie Consent
We use cookies to improve your experience on our site. By using our site, you consent to cookies.
This website uses cookies
Websites store cookies to enhance functionality and personalise your experience. You can manage your preferences, but blocking some cookies may impact site performance and services.
Essential cookies enable basic functions and are necessary for the proper function of the website.
Name
Description
Duration
Cookie Preferences
This cookie is used to store the user's cookie consent preferences.
30 days
Cookie Preferences
This cookie is used to store the user's cookie consent preferences.
30 days
This cookie is set by Cloudflare to help manage bot traffic and protect the website from malicious activity. It does not collect or store any personal data and is used solely for security and performance purposes.
ID used to identify users for 24 hours after last activity
24 hours
_gat
Used to monitor number of Google Analytics server requests when using Google Tag Manager
1 minute
__utmt
Used to monitor number of Google Analytics server requests
10 minutes
__utmb
Used to distinguish new sessions and visits. This cookie is set when the GA.js javascript library is loaded and there is no existing __utmb cookie. The cookie is updated every time data is sent to the Google Analytics server.
30 minutes after last activity
__utmc
Used only with old Urchin versions of Google Analytics and not with GA.js. Was used to distinguish between new sessions and visits at the end of a session.
End of session (browser)
__utmz
Contains information about the traffic source or campaign that directed user to the website. The cookie is set when the GA.js javascript is loaded and updated when data is sent to the Google Anaytics server
6 months after last activity
__utmv
Contains custom information set by the web developer via the _setCustomVar method in Google Analytics. This cookie is updated every time new data is sent to the Google Analytics server.
2 years after last activity
__utmx
Used to determine whether a user is included in an A / B or Multivariate test.
18 months
_ga
ID used to identify users
2 years
_gali
Used by Google Analytics to determine which links on a page are being clicked
30 seconds
_gac_
Contains information related to marketing campaigns of the user. These are shared with Google AdWords / Google Ads when the Google Ads and Google Analytics accounts are linked together.
90 days
__utma
ID used to identify users and sessions
2 years after last activity
Clarity is a web analytics service that tracks and reports website traffic.