Do you want to make handling forms on your WordPress site much easier?
You might be finalizing deals, welcoming new team members, doing online contract Agreements, or managing contracts, adding an electronic signature feature can make everything much smoother.
It’s super simple with the Bit Form plugin! This guide will show you the easy steps to add an electronic or digital signature to your WordPress forms, to make your website more effective and user-friendly.
Get ready to power up your site with Bit Form and improve your digital processes more functional & easier!
Table of Contents
What is an Electronic Signature (E-Signature)?
An electronic signature or e-signature, is a digital version of your traditional pen and ink signature. It provides a method for signing documents online without printing/signing and scanning the documents.
E-signatures offer a secure way to authenticate documents electronically and are legally binding in most countries worldwide. Now, with Bit Form, it is easy to add this feature to your forms to ensure that all your online interactions are smooth and secure.
Why Sign Documents with E-Signatures?
Speed and Efficiency: E-signatures dramatically reduce the time to finalize agreements. Because there’s no need to wait for physical documents to be mailed or delivered.
Security and Authentication: Electronic Signature has the ability to track and encrypt, which ensures the signed document is secure and verifiable.
Cost-Effective: Save on printing, paper, ink, and postage costs, making e-signatures an environmentally friendly alternative to traditional methods.
Legally Binding: Most legal systems recognize e-signatures, making them just as valid as their handwritten counterparts for almost all types of documents.
How to add E-Signatures to Your WordPress Form
Let’s add e-signatures to your WordPress form with the Bit Form plugin. Here we will create a legal forms with the Bit Form signatures field. Let’s create the form.
1. Install & Activate the Bit Form plugin
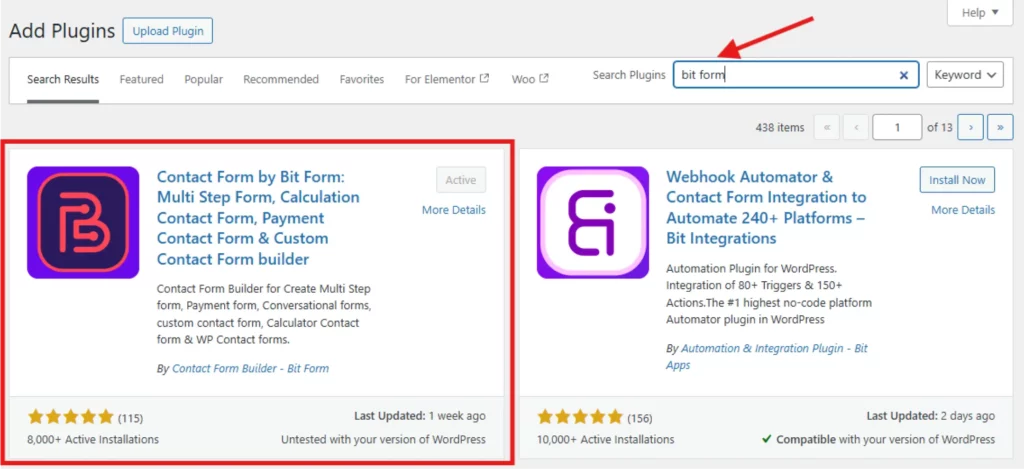
To install the Bit Form on your WordPress site navigate to your WordPress Dashboard> Plugins> Add New. On the search bar search for the Bit Form plugin. Activate & Install the plugin.
2. Create a New Form
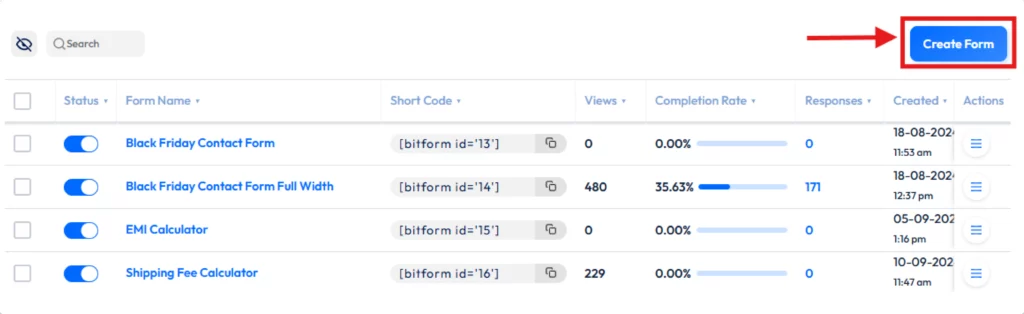
Now you need to create a form. To create a form, click on the Bit Form menu from your WordPress dashboard and click on the Create Form.
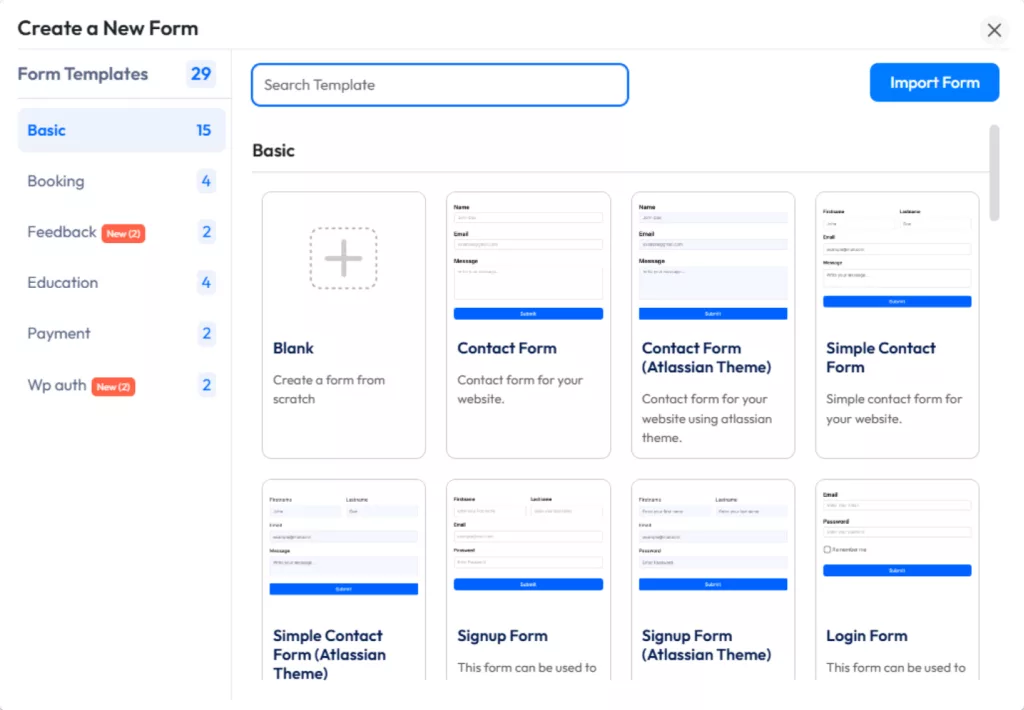
You can choose from templates or you can start with a blank form. Here I will create a form from scratch.
3. Add Fields to Your Form
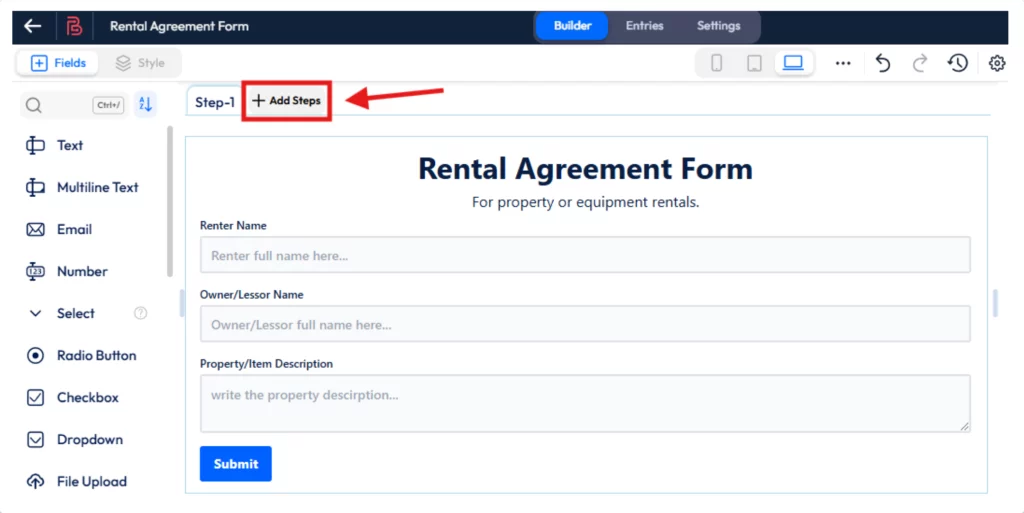
Now we have to add the required fields to the form including the signature fields. At first, we will create a “Rental Agreement Form” and we will add some essential fields like form title, name fields, rentar name, owner name, property description, rental duration, rental fee and payment terms, deposit amount, terms and conditions, and finally the signature fields.
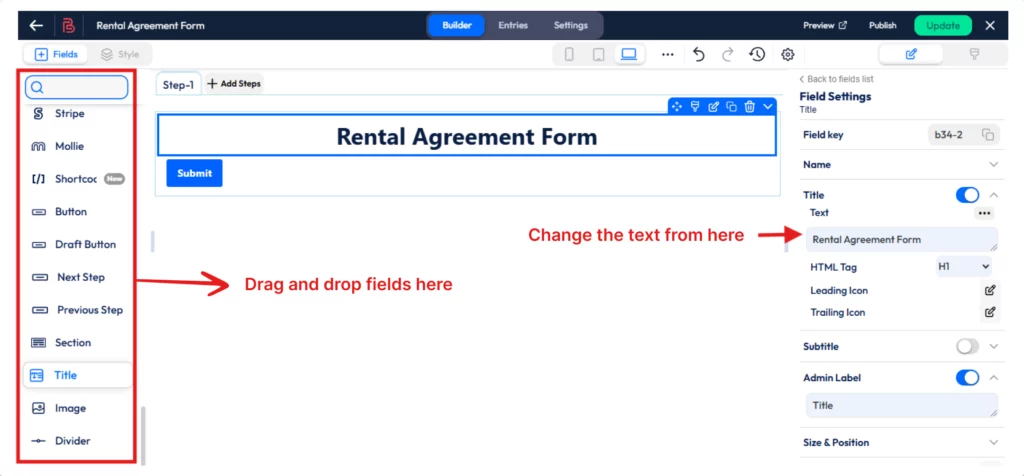
Now choose the field from the field section (left on the Bit Form builder), and drag the field on the builder. I will add a title and subtitle to the form. To add a title just drag and drop the title field to your form and customize the font size, color, font weight, and more whatever you need.
I will make it a multi-step form and complete the rental agreement process in 3 steps.
1st step: Basic information (Renter and Owner name and property description)
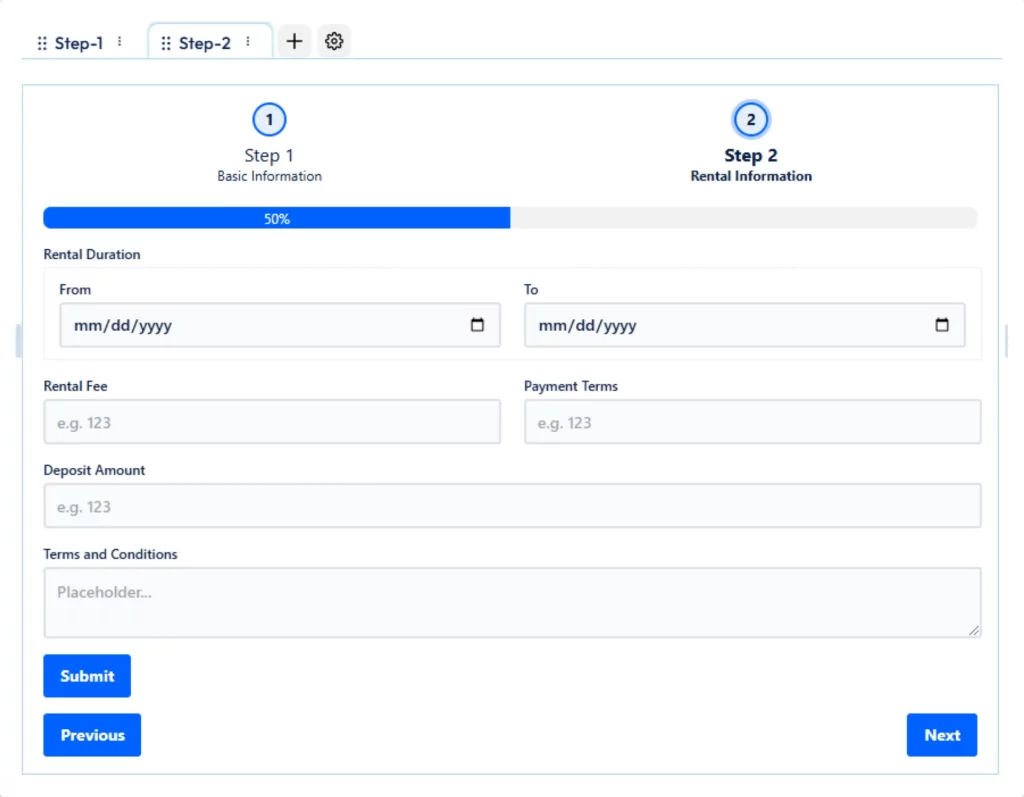
2nd step: Rental information (Including rent fee, duration, and rent terms & conditions)
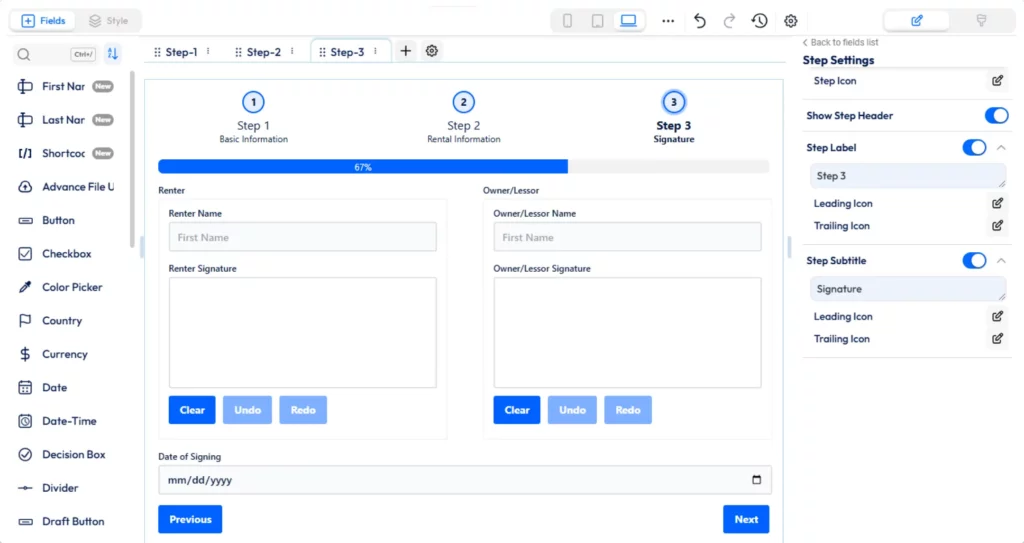
3rd step: Signature and date (Here I will add two signature fields, one for owner and another one for renter)
To make a multi-step form in Bit Form, Click on the + Add Steps.
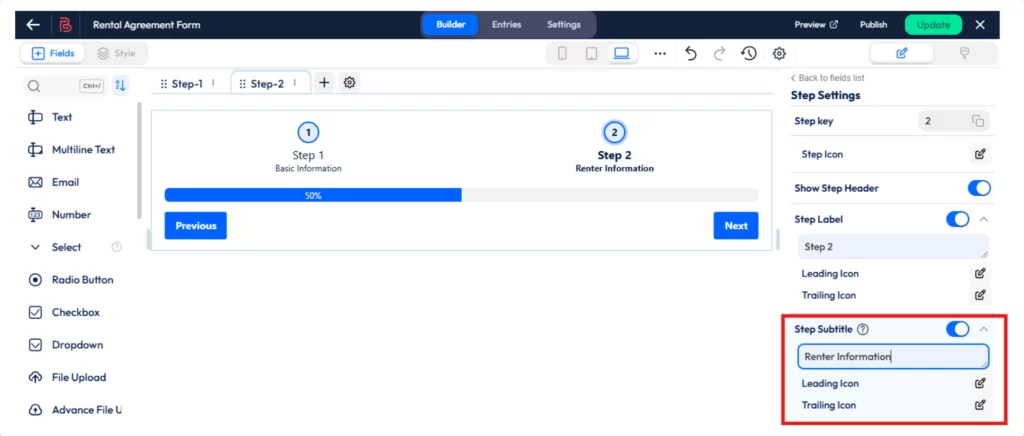
This will add new steps to the form. You can add as many steps as you need but remember to keep your form clean and organized by following best practices. You can change the step name and step description from the right panel. To have the panel just click on the step.
Now, add all essential fields in step 2. You can resize the column by decreasing the field width and making the form look good.
Now add another step for the signature and date field. In this step, we will add the renter and owner’s name, signature, and date of signing. To organize the form, use the Bit Form section field and divide the name and signature field into two columns. After the date add a date field to get the signing date.
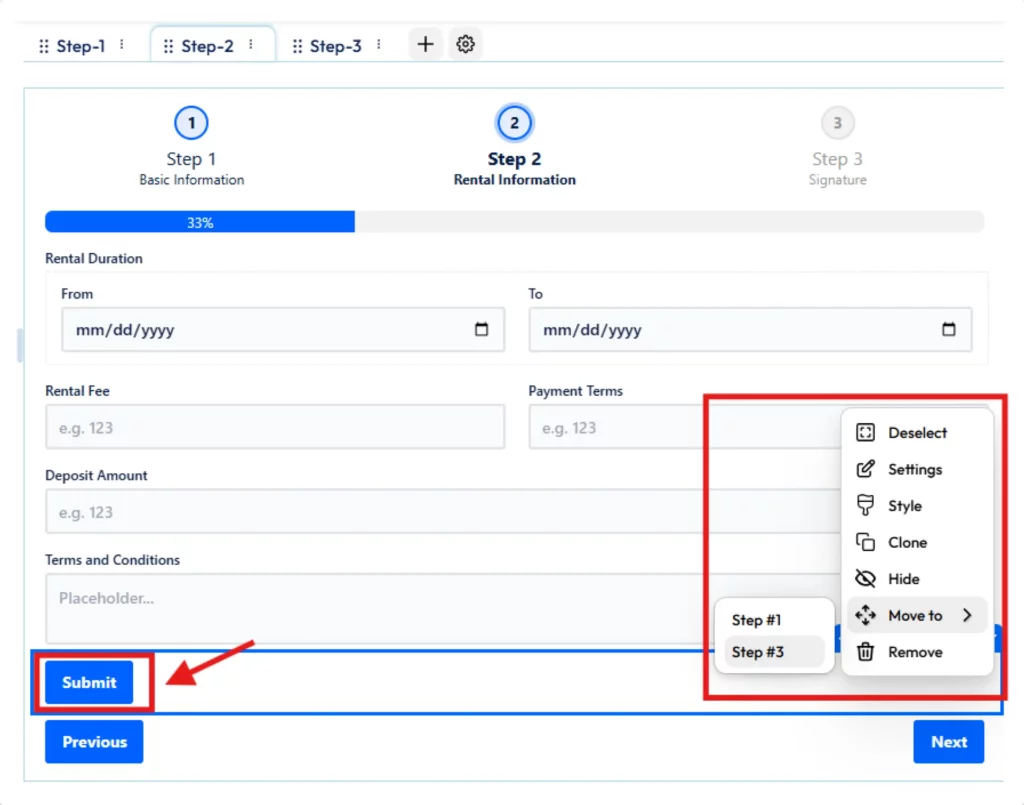
After adding all the fields you have to find the submit button, if the submit button is in step 1 or step two, move the submit button to the last step as we need the button to submit the form.
To do that just click on the submit button> and hit the down arrow> Move to> and select the last steps (here last step is Step #3).
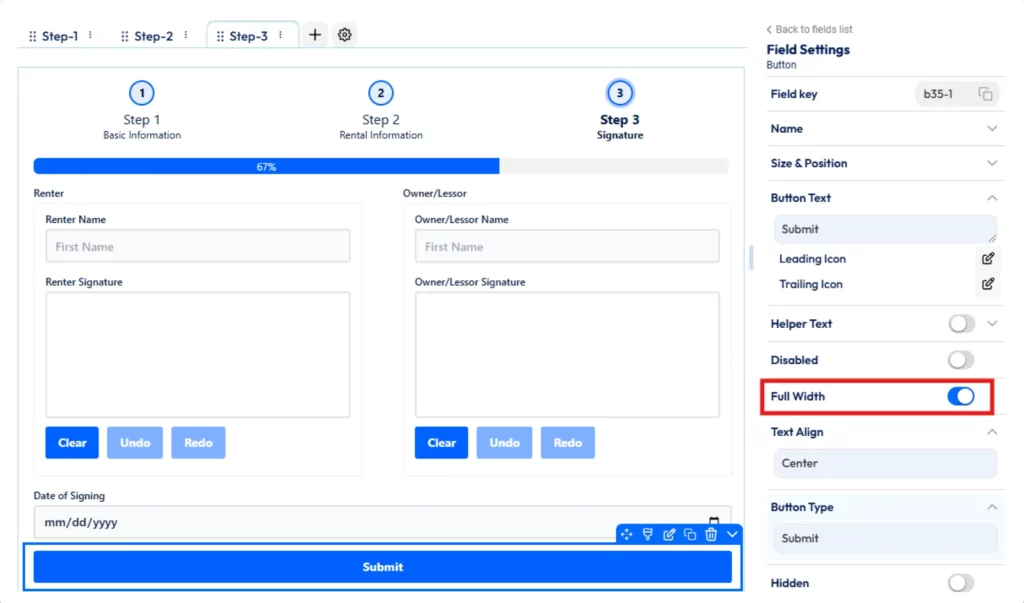
You can make the submit button width full or align the button as per your preferences.
4. Customize Your Form
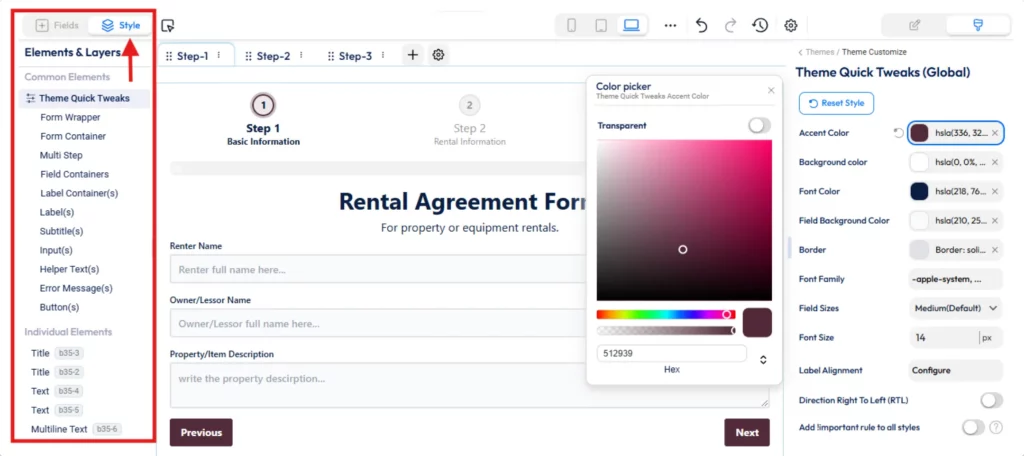
Bit Form is very customizable and user-friendly. You can style each of the elements of the form and match the form with your brand color. To get the style editor click on the Style tab on the Bit Form builder.
💡Pro Tips: To customize and style your form just follow this easy style guide.
5. Save and Publish Your Form
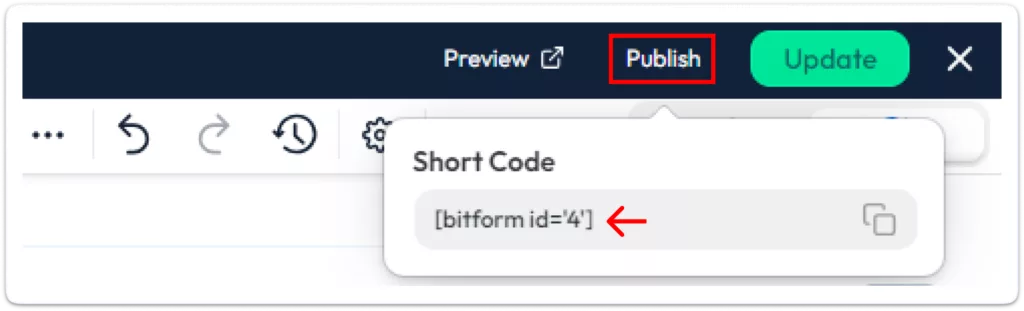
Use the Bit Form shortcode to add your form to any WordPress page, post, or on your sidebar. Preview and test to make sure it works well!
You will get the shortcode by clicking on the “Publish” button.
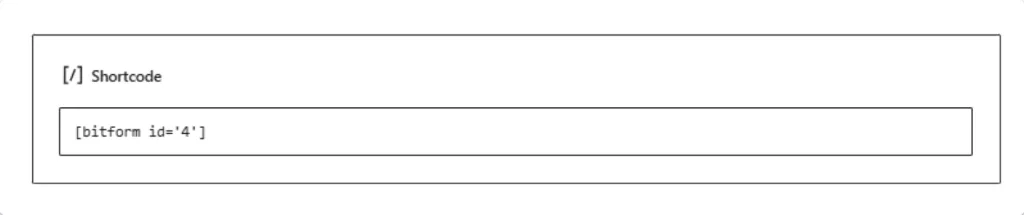
Now paste the shortcode wherever you want to show the form.
Tips for Using E-Signatures in WordPress Forms
Ensure Security: Bit Form secures your sensitive data and ensures signatures cannot be tampered with.
Mobile Compatibility: Test your form on both desktop and mobile devices to ensure users can easily sign from any device.
Monitor Responses: Regularly check for new submissions to ensure you don’t miss important signed documents.
Conclusion
Whether you’re handling client contracts, team documents, or online agreements, adding an electronic signature feature to your forms can save time, simplify your workflows, and enhance your users’ experience.
With Bit Form, integrating electronic signatures in WordPress is incredibly easy. It’s time to optimize your processes and offer a more professional, user-friendly experience to your audience.
Don’t wait, install Bit Form today and transform your website into a workflow powerhouse.
He writes about WordPress, SEO, automation, and SaaS with hands-on experience. He creates tutorials, comparisons, and practical content by understanding real use cases, search intent, and AI visibility.
Many WordPress users need to change their admin email for different reasons. Sometimes you lose access to your old email. Sometimes it gets hacked. And when that happens, you stop receiving important emails, like password reset links, security alerts, or update notifications. That can be a big problem. Another common reason is switching to a […]
WPForms Lite users often face a common problem. The free version does not store form entries in the dashboard. Instead, it only sends submissions by email. This means you cannot view or manage entries inside WordPress. This setup can quickly become frustrating. Important emails may land in spam or get lost. Without upgrading to Pro, […]
AI is changing how WordPress websites create content and automate daily tasks. But many website owners still struggle to connect powerful AI tools without paying extra or dealing with complex setups. While many creators are still stuck in the “copy-paste” loop with AI tools, WordPress Gemini Plugin is revolutionizing how websites use artificial intelligence to […]
Cookie Consent
We use cookies to improve your experience on our site. By using our site, you consent to cookies.
This website uses cookies
Websites store cookies to enhance functionality and personalise your experience. You can manage your preferences, but blocking some cookies may impact site performance and services.
Essential cookies enable basic functions and are necessary for the proper function of the website.
Name
Description
Duration
Cookie Preferences
This cookie is used to store the user's cookie consent preferences.
30 days
Cookie Preferences
This cookie is used to store the user's cookie consent preferences.
30 days
Cookie Preferences
This cookie is used to store the user's cookie consent preferences.
30 days
This cookie is set by Cloudflare to help manage bot traffic and protect the website from malicious activity. It does not collect or store any personal data and is used solely for security and performance purposes.
Used to monitor number of Google Analytics server requests
10 minutes
__utmb
Used to distinguish new sessions and visits. This cookie is set when the GA.js javascript library is loaded and there is no existing __utmb cookie. The cookie is updated every time data is sent to the Google Analytics server.
30 minutes after last activity
__utmc
Used only with old Urchin versions of Google Analytics and not with GA.js. Was used to distinguish between new sessions and visits at the end of a session.
End of session (browser)
__utmz
Contains information about the traffic source or campaign that directed user to the website. The cookie is set when the GA.js javascript is loaded and updated when data is sent to the Google Anaytics server
6 months after last activity
__utmv
Contains custom information set by the web developer via the _setCustomVar method in Google Analytics. This cookie is updated every time new data is sent to the Google Analytics server.
2 years after last activity
__utmx
Used to determine whether a user is included in an A / B or Multivariate test.
18 months
_ga
ID used to identify users
2 years
_gali
Used by Google Analytics to determine which links on a page are being clicked
30 seconds
_ga_
ID used to identify users
2 years
_gid
ID used to identify users for 24 hours after last activity
24 hours
_gat
Used to monitor number of Google Analytics server requests when using Google Tag Manager
1 minute
__utma
ID used to identify users and sessions
2 years after last activity
_gac_
Contains information related to marketing campaigns of the user. These are shared with Google AdWords / Google Ads when the Google Ads and Google Analytics accounts are linked together.
90 days
Clarity is a web analytics service that tracks and reports website traffic.