Elementor is a popular WordPress page builder that makes creating forms easy and visual. It offers a Form widget (in Elementor Pro) that lets you drag and drop fields onto a page.
Using this widget, you can build simple contact forms without writing any code. The Elementor form widget can fulfill your basic form needs for a simple Elementor contact form with some basic form fields.
In this guide, I will show how to add a form with Elementor Pro, discuss its limits, and introduce the Bit Form plugin as a free Elementor form alternative. By using the plugin, you can create a contact form without Elementor Pro plugin. Let’s build the form!
Table of Contents
Creating an Elementor Contact Form with Elementor Pro
Once you have the Elementor Pro version, you will be able to create a form by using the Elementor Form widgets. Let’s see how you can build an Elementor contact form in minutes:
ℹ️ To create a form with Elementor, you must have the Elementor Pro plugin. The form widget is only available on the Pro version! If you are not an Elementor Pro user, don’t worry. In this guide, you will get another powerful free solution!
Adding the form widget to the page: Edit your page with Elementor and look for the Form widget in the panel. Simply drag and drop the Form widget into the section where you want your contact form. This inserts a basic Elementor contact form into your page.
Adding fields to the form: With the form selected, go to the panel on the left. You’ll see the default fields (e.g., Name, Email, Message). You can click each field to edit its label, placeholder, and settings.
To add more fields, click “Add Item” and choose the type of field (text, email, textarea, dropdown, etc). Elementor supports most common field types (text, text area, radio buttons, select menus, etc.) and lets you mark fields as required.
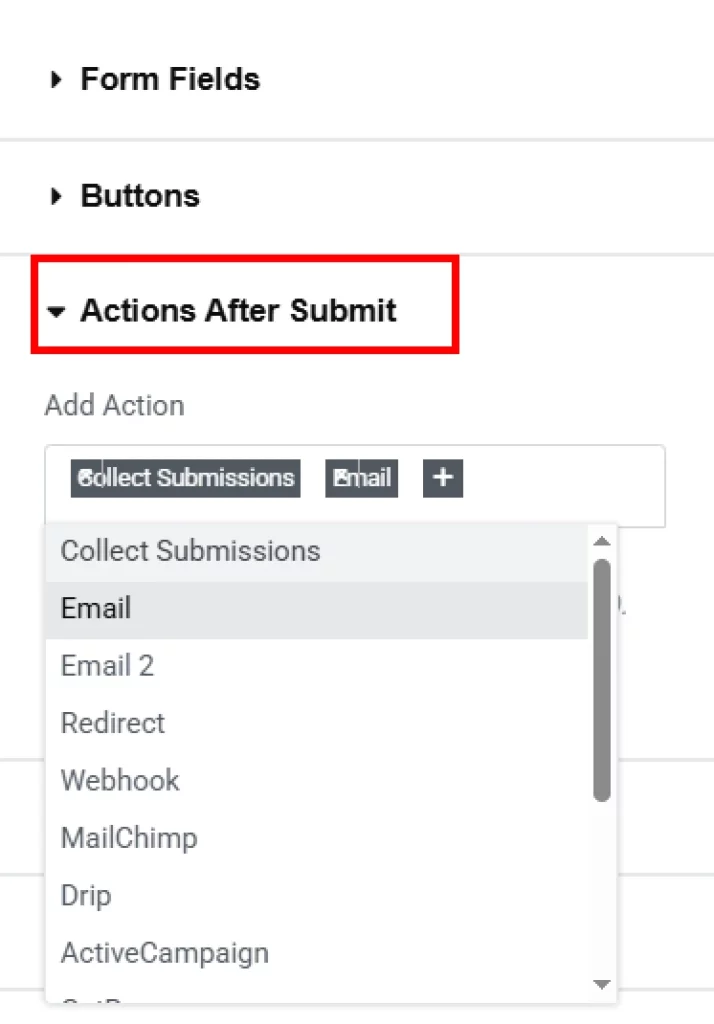
Setting up form submission: Next, configure what happens after the user submits the form. In the widget’s content options, open “Actions After Submit.”
By default, Email is enabled. Go to the Email tab and enter the recipient address (e.g., your email) and subject line.
You can customize the message body to include the form fields. If you want, you can add extra actions (e.g. redirect, webhook, or a success message). When the form is submitted, Elementor will send an email to you with the entry details.
Designing the form: To match your site’s look, style the form using the Style tab in the Elementor panel. Here you can change colors, fonts, button styles, spacing, and more.
For example, adjust the input field padding and borders for clean spacing, set background colors, and style the submit button with your brand colors. The Style tab also lets you set column widths so fields can appear side-by-side. Playing with these options ensures your form looks on-brand and is easy to use.
Publish and test: Once your form is set up and styled, click Publish or Update in Elementor. Then, view the page on the front end and test the form to make sure submissions go through (you should receive the test email).
Can Elementor Form Fulfill All Your Form Needs?
Well, if you need a simple contact form or a basic form, Elementor Form surely can fulfill your basic form needs. Elementor forms are simple and user-friendly. However, they do have some limitations compared to more dedicated WordPress form plugins:
Limited field types: The built-in form widget supports common fields, but it doesn’t include more specialized fields like repeater, country, currency, rating, image select, or signature fields natively.
Elementor Form Fields
No built-in payment fields: Elementor’s form widget does not have native payment fields. So you cannot collect payments directly in an Elementor form.
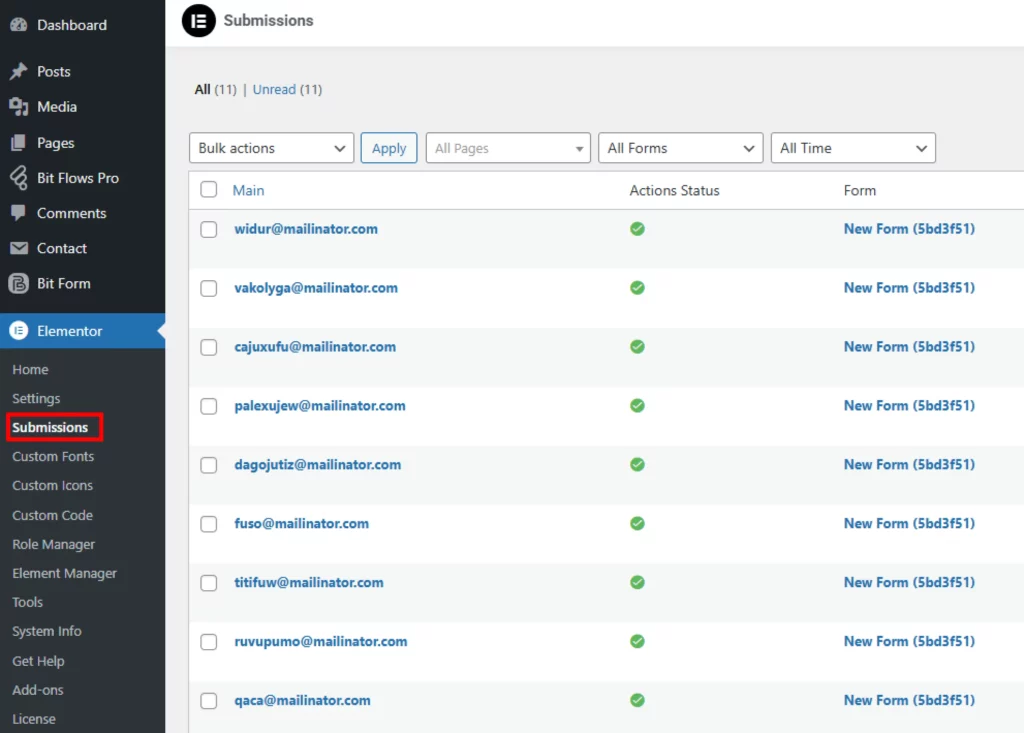
Basic submission handling: Elementor can store submissions (you’ll find entries under Elementor > Submissions in WP-Admin),
but this is fairly basic. There’s no built-in analytics dashboard, reporting, or sorting of entries beyond the simple list view.
No built-in advanced automation: There are no built-in advanced automations or conditional logic in the core Elementor form widget. If you need to automatically add contacts to an email list, run multi-step workflows, or trigger campaigns, you will need additional services or plugins.
💡 With the Bit Flows plugin (Offers free actions for Elementor Form users), you can automate your form submission and create multi-step workflows to send the form data to different tools.
Feature extensions require add-ons: Many useful features are only available via third-party Elementor add-ons. Elementor alone keeps things lightweight, so it doesn’t include every advanced form function.
Elementor’s Form widget is great for quick, simple forms, but it doesn’t cover every advanced need. For users who want more power (especially on a budget), a more feature-rich plugin may be better.
Creating an Elementor Contact Form for Free with Bit Form Plugin
If you don’t have Elementor Pro or need more features for free, the Bit Form free contact form plugin is an excellent option. Bit Form is a lightweight, drag-and-drop form builder that works smoothly with Elementor (and other page builders). Here’s how to create a contact form using Bit Form:
How to Create a Contact Form without Elementor Pro
Install and activate Bit Form: In your WordPress dashboard, go to Plugins > Add New, search for “Bit Form”, and click Install Now. Then activate the plugin. Bit Form has a free version that already includes many features.
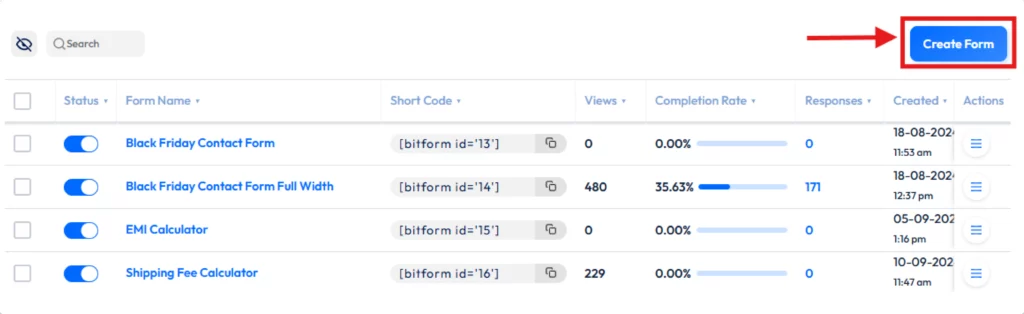
Create a new form: In the admin menu, click Bit Form > Add New. Give your form a title and open the form builder.
You’ll see an intuitive drag-and-drop interface. On the left are all the field types (text, email, textarea, phone, country, etc.). Drag any field onto the form builder to add it.
You can edit labels, placeholders, and validation rules for each field. Bit Form supports advanced field types (phone number, country dropdown, currency selector, date, signature, and more).
Set up form settings: Bit Form lets you configure email notifications, confirmation messages, and other behaviors. You can enable conditional logic or multiple email templates if needed.
By default, Bit Form will email you with form entries (you can customize the email template). You can also configure integrations or webhooks later if needed.
Style the form: Bit Form includes a built-in advanced style editor that allows you to customize and style the form. Choose the Style tab (or section) and customize colors, fonts, backgrounds, and layouts.
You can even select from form themes or use no theme to start from a blank. Bit Form supports multi-column layouts (up to 60 columns per row) so you can make compact, professional designs.
Insert the form in Elementor: Edit the page in Elementor where you want the form. In the widget panel, search for “Bit Form”. There will be a Bit Form widget. Drag it into your page. In the widget settings, choose the form you just created from the dropdown. The form will display on the page.
Publish and test: Save your Elementor page. Then try submitting the form on the live page. You should receive the entry via email, and it will be saved in Bit Form > Entries in the WP admin.
By using Bit Form, you get a full-featured form builder for free, integrated into Elementor pages.
Benefits of Using Bit Form Compared to Elementor Form
Let’s see what benefits you will get if you use the Bit Form plugin:
More advanced field types: Bit Form offers 40+ field types, including signature fields, country lists, currency, file uploads, and special fields like repeater. Elementor’s form widget has more limited default fields.
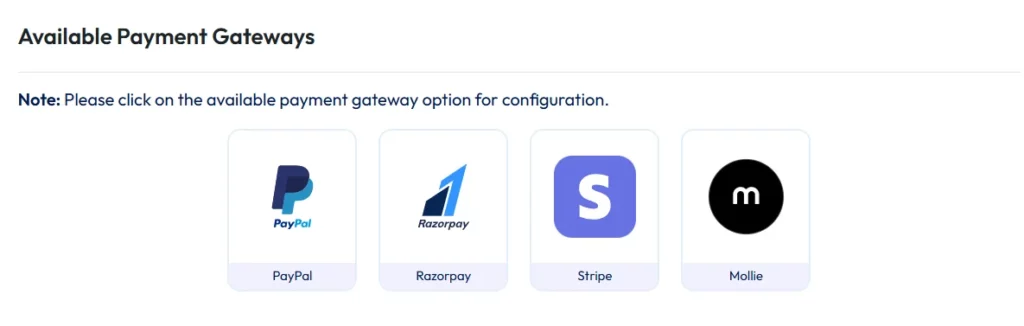
Built-in payment support: Bit Form lets you create payment forms. It integrates easily with gateways like PayPal, Stripe, Razorpay, and Mollie for collecting payments. You don’t need extra plugins to charge for products or donations.
Powerful layouts: Bit Form’s unique multi-column layout can use up to 60 columns per row. This allows very compact, professional-looking forms. Elementor’s form also has column settings, but Bit Form takes it to a more advanced level.
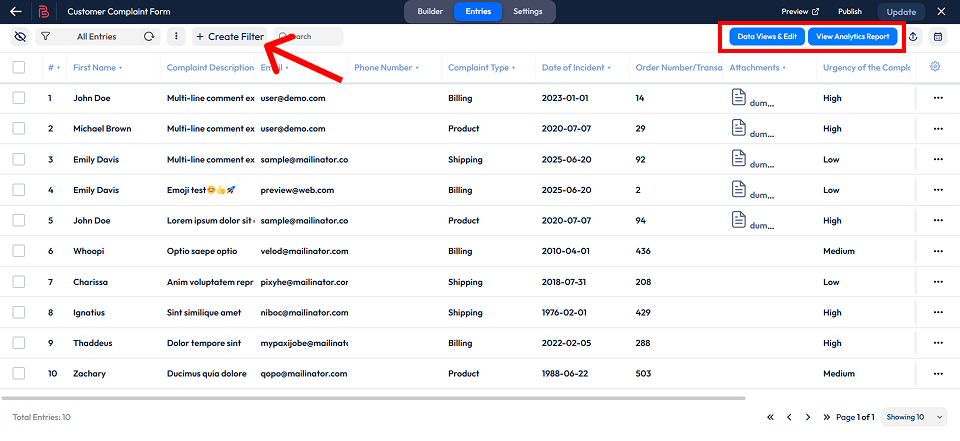
Advanced submission management: Bit Form stores unlimited entries and gives you a full submissions dashboard. You can search, sort, filter, edit, or bulk-delete entries, and export them to CSV/Excel/HTML/JSON, etc.
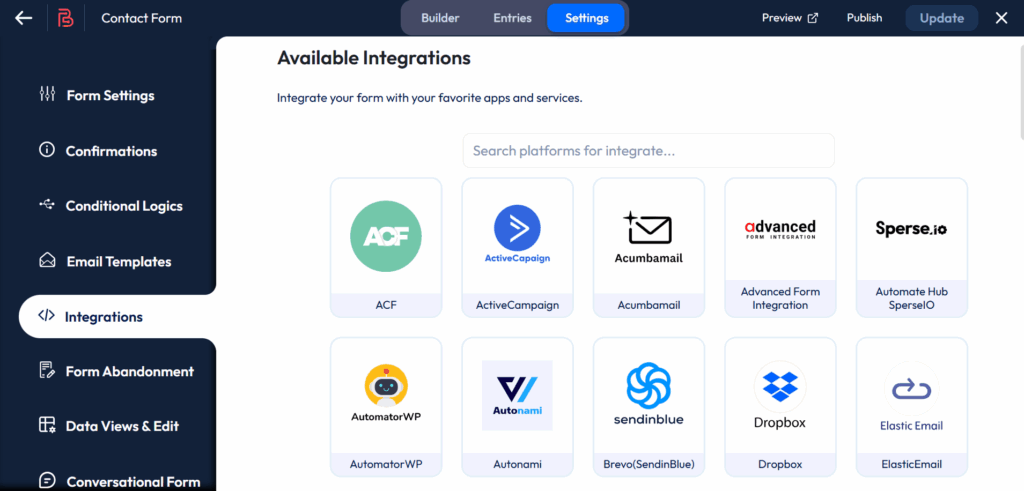
Automations and integrations: Bit Form comes with 51+ built-in integrations (CRM, email marketing, Google Sheets, WooCommerce, MailChimp, etc.) and webhooks. You can automate workflows (send data to other tools) without paying extra.
Conditional logic & workflows: Bit Form supports conditional logic rules (show/hide fields, send emails or redirects on conditions, etc). You can run different actions based on user input.
Styling & performance: Bit Form has a built-in style editor with pre-made templates. It is also highly optimized and lightweight (only ~10KB JS, 3KB CSS), so forms load very fast. Elementor forms are also fast, but Bit Form is built for performance.
Free vs. Paid: Unlike Elementor’s form (which requires Pro), Bit Form’s free version includes many of these features. Upgrading to Bit Form Pro adds even more, such as payment options and unlimited conditions, but the free plugin is already powerful than the Elementor Form.
In short, Bit Form gives you greater flexibility and features than Elementor’s default form widget, especially if you need advanced fields, payments, or integrations. It is fully compatible with Elementor and lets even free users build powerful forms.
Conclusion
Elementor’s Form widget makes it easy to set up a basic Elementor contact form with drag-and-drop fields and email notifications. For simple needs, it works great and integrates smoothly with your site’s design.
However, Elementor forms are somewhat limited in features, such as no built-in payments, limited field types, etc. For more advanced requirements or for free users, the Bit Form plugin is an excellent Elementor form alternative. Bit Form offers many advanced fields, advanced automation, styling options, and submission management even in its free version.
Ultimately, choose the tool that fits your needs: use Elementor’s form for quick, basic Elementor contact forms, and turn to Bit Form when you need more power. Both options can work together; you can even add Bit Form forms on Elementor pages, so you get the best of both worlds.
FAQs
Do I need Elementor Pro to create a contact form?
Yes. The built-in Form widget is only available in Elementor Pro. If you use Elementor Free, you cannot create forms without extra plugins. As an Elementor form alternative, you can install a free form plugin like Bit Form and embed it in Elementor.
How do I add a contact form in Elementor?
Edit the page with Elementor, then drag the Form widget into your layout. From there, customize the form’s fields and settings. For free users, install the Bit Form plugin, create a form in its dashboard, and use the “Bit Form” widget in Elementor to insert it.
Can I accept payments using an Elementor form?
Not by default. Elementor’s form widget has no native payment field. To accept money, you need a third-party solution. For example, use a payment integration plugin (like one for Stripe or PayPal) or use Bit Form’s payment features, which include PayPal and Stripe fields in the form builder.
What advanced features does Bit Form provide?
Bit Form includes many features beyond Elementor’s basic form. It has 40+ field types (phone, country, currency, etc.), conditional logic, multi-step forms, unlimited columns, automated integrations with 51+ services, and submission analytics. It also provides a built-in style editor and templates for easy design.
Is Bit Form free to use?
Yes, Bit Form offers a free version. The free version already includes many advanced field types, multi-step forms, conditional logic, spam protection, and 50+ integrations.
A Pro version is available for more features, like extra payment gateways and reporting. For many users, the free Bit Form is enough to build a powerful form without cost.
He writes about WordPress, SEO, automation, and SaaS with hands-on experience. He creates tutorials, comparisons, and practical content by understanding real use cases, search intent, and AI visibility.
Many WordPress users need to change their admin email for different reasons. Sometimes you lose access to your old email. Sometimes it gets hacked. And when that happens, you stop receiving important emails, like password reset links, security alerts, or update notifications. That can be a big problem. Another common reason is switching to a […]
WPForms Lite users often face a common problem. The free version does not store form entries in the dashboard. Instead, it only sends submissions by email. This means you cannot view or manage entries inside WordPress. This setup can quickly become frustrating. Important emails may land in spam or get lost. Without upgrading to Pro, […]
AI is changing how WordPress websites create content and automate daily tasks. But many website owners still struggle to connect powerful AI tools without paying extra or dealing with complex setups. While many creators are still stuck in the “copy-paste” loop with AI tools, WordPress Gemini Plugin is revolutionizing how websites use artificial intelligence to […]
Cookie Consent
We use cookies to improve your experience on our site. By using our site, you consent to cookies.
This website uses cookies
Websites store cookies to enhance functionality and personalise your experience. You can manage your preferences, but blocking some cookies may impact site performance and services.
Essential cookies enable basic functions and are necessary for the proper function of the website.
Name
Description
Duration
Cookie Preferences
This cookie is used to store the user's cookie consent preferences.
30 days
Cookie Preferences
This cookie is used to store the user's cookie consent preferences.
30 days
Cookie Preferences
This cookie is used to store the user's cookie consent preferences.
30 days
This cookie is set by Cloudflare to help manage bot traffic and protect the website from malicious activity. It does not collect or store any personal data and is used solely for security and performance purposes.
ID used to identify users for 24 hours after last activity
24 hours
_gat
Used to monitor number of Google Analytics server requests when using Google Tag Manager
1 minute
__utmt
Used to monitor number of Google Analytics server requests
10 minutes
__utmb
Used to distinguish new sessions and visits. This cookie is set when the GA.js javascript library is loaded and there is no existing __utmb cookie. The cookie is updated every time data is sent to the Google Analytics server.
30 minutes after last activity
__utmc
Used only with old Urchin versions of Google Analytics and not with GA.js. Was used to distinguish between new sessions and visits at the end of a session.
End of session (browser)
__utmz
Contains information about the traffic source or campaign that directed user to the website. The cookie is set when the GA.js javascript is loaded and updated when data is sent to the Google Anaytics server
6 months after last activity
__utmv
Contains custom information set by the web developer via the _setCustomVar method in Google Analytics. This cookie is updated every time new data is sent to the Google Analytics server.
2 years after last activity
__utmx
Used to determine whether a user is included in an A / B or Multivariate test.
18 months
_ga
ID used to identify users
2 years
_gali
Used by Google Analytics to determine which links on a page are being clicked
30 seconds
_ga_
ID used to identify users
2 years
_gac_
Contains information related to marketing campaigns of the user. These are shared with Google AdWords / Google Ads when the Google Ads and Google Analytics accounts are linked together.
90 days
__utma
ID used to identify users and sessions
2 years after last activity
Clarity is a web analytics service that tracks and reports website traffic.