Using a form builder plugin that supports conditional logic, you may enhance your WordPress form to the next level. But, before that, you have to install and activate a form builder plugin.
There are a ton of form builder plugins with advanced conditional logic available on the market, including Bit Form, Fluent Form, WPForms, Ninja Form, and many more. Bit Form is the lightest of them all and offers the most advanced features, including complex conditional logic and calculator, multi step, SMTP, over 50 integrations, and a plethora of features available in free editions, unlike others.
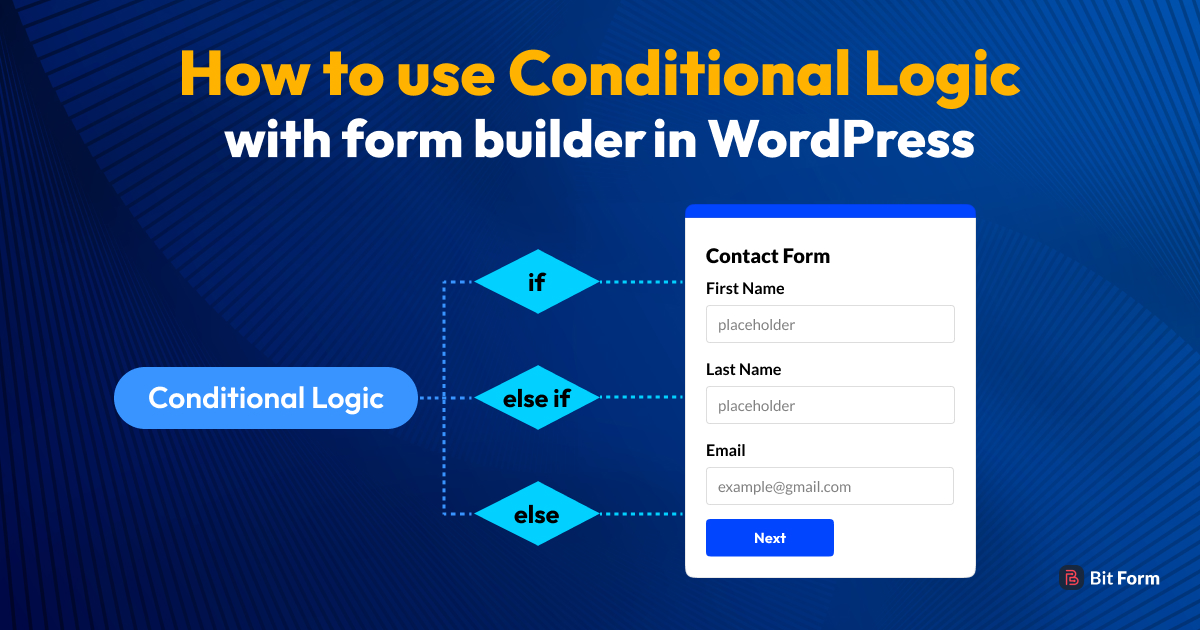
Here we have demonstrated different types of contact forms Using different conditional logics and different use cases so that you can make any easy-to-advanced form using this form builder plugin.
However, some features are restricted in the free edition, and you are unable to create any sophisticated forms. To obtain complete premium access at the cheapest price, you must buy a pro form builder plugin.
Table of Contents
What is conditional logic in the form builder and why important?
Conditional logic allows you to create dynamic forms that change based on user input. For instance, if a user answers “Yes” to a particular question, then another set of fields might appear, relevant to that response. A long-form can be intimidating and may prevent users from filling it out. By using conditional logic with form builder, you can show only the necessary questions, making the form seem shorter and more approachable.
By displaying just important information and concealing extraneous ones, it improves user experience while shortening and streamlining forms.
It aids in gathering more accurate and focused data from consumers. It enables designers to produce more interactive and dynamic forms that are tailored to the specific requirements of each user.
A form with conditional logic can avoid information overload, By giving consumers just important questions, Users will spend less time and effort filling out forms since they won’t have to scroll through pointless fields.
For example, if a user answers “No” to a question like “Do you have any pets?”, they don’t need to see follow-up questions like “What type of pet do you have?” or “How many pets do you have?”.
How to use Conditional Logic with form builder in WordPress
The Bit Form plugin greatly simplifies the user experience for users. With the help of this form builder, users can quickly add conditional logic to their WordPress forms. Here, I’ve used several conditional logics to generate forms that range from simple to complex. With Bit Form, you can use this knowledge to design any complex form. To create an advanced form, you don’t even need to write one line of code.
Course Enrollment Form
For example, in your WordPress site if you want to make a course enrollment form using conditional logic, and you want your users to enroll in a beginner or advanced-level course, your users may click on one option. Under these options, you will get several courses to choose from.
For example
If you select →Beginner,
then, Graphic Design/Content Writing/Meta Marketing options will be shown, and all the advanced courses will be Hidden.
Again, If you select the Advanced option
Then, SEO/Web Development/Data Analysis options will be shown. All the beginner courses will be hidden.
Now the question is how to create this type of form. Simply you have to apply conditional logic. Just go to the setting→Conditional Logics.
Don’t forget to check “only on Field Input” under the Action Effect. Now you are ready to apply the condition here. If you notice you can see these conditions are exactly similar to what I wrote above. So simple condition, you will never feel any difficulties while using conditional logic.
Medical History Form
If you want to make a medical form on your WordPress site where your users can fill it with their specific medical problems for getting treatment from a doctor, you can make this form with simple conditional logic.
The form will be something like the below one. For example, if the user selects allergy then allergy-related diseases will be shown. If the user selects cancer then cancer-related all diseases will be shown in the dropdown box. After that if you select any specific problems from the dropdown box, a paragraph box will be shown automatically so that your user can write something deep about their problems, otherwise, it will always remain hidden.
Actions:
Drag and drop one radio button, one dropdown box, and one multiline text field. Here I will hide the multiline text field so that the user won’t see this field until he or she clicks on the dropdown box field.
Well, click on the dropdown box and your right side make 3 lists from “add option lists” for allergy, cancer and eye diseases. When you select allergy only allergy-related diseases will be shown. To make it, you have to put conditional logic with this form builder.
Now go to the setting→Conditional Logics
This logic says that if you select allergy disease then “Allergy list-1” will be noticeable in the dropdown box. If you select eye diseases, then only “eye disease list-2” will be noticeable.
Now put another condition like if you select one option from the drop-down box which is named here the “Select Specific Problems” field, then the “multi-text line” field will be noticeable otherwise, it will remain hidden.
To put this condition, you have to add another simple conditional logic with this form builder. Here it will be added as action 2. If the drop-down box I mean the “Select specific problem” field is not null, then the “Write Deep About Your Problem” field will be noticeable. Otherwise, it will remain hidden at all times. That’s all. So easy to apply this conditional logic with this form builder.
Booking or Reservation Form
You can make booking and reservation forms with Bit Form Pro. This booking and Reservation form may make you a bit difficult. But once you can make it, you will be able to make the most advanced form using this conditional logic. I think you are too excited to make this form with me. Let’s start the game.
In this form, there will be a radio button where multiple countries will be included and a drop-down box list where multiple airport lists will be included under the country. One country may have multiple airports. For example, India has many airports like Pune Airport and Goa Airport. So when you click India from the “Select Country” field only India-related Airports will be shown. When you select Russia then Russia-related Airports will be shown.
Next, when you click on Pune International Airport from the “Select Airport” dropdown box, a message field will be visible where you will get some cost and carry-related info based on this Airport. For example, if you click on Pune International Airport from the drop-down box then you will get all information based on Pune Airport. If you click on Goa International Airport then you will get all info based on Goa Airport and other info will remain hidden.
The form will be like the below one.
Action:
Again choose radio and drop-down box field. Put three options in the add option area such are India, Russia, and USA and don’t forget to change the label name of the radio box and drop-down box field. The Radio Box field label name is “Select Country” and the drop-down box name is “Select Airport” in this form.
Drag and drop html field according to your needs. If you add five Airport lists for one country you have to add five HTML fields for every particular airport list. Now change the admin label name and write something in the content area whatever you want to write.
Now you can make the style of the specific field from the style editor option if you want. Here you can add margin, padding, font, background color and so many other things. Now you can copy this field.
Hide all the HTML field as you never want to show this field until your user click on the Airport field.
Now you have to put conditional logics, To make it, go to→setting→Conditional logics, and put the logics as I showed you. The meaning of this logic is if the “Select Country” is equal to “India” then only the Airport list of India will be available in the “Select Airport” field. Similarly, put the same condition for Russia and the USA.
Now you have to put another conditional logic with this form builder. When you select Airport from the “Select Airport” field only related info will appear and other info will not appear. For making this the condition will be like the below one. By the way, don’t forget to add another conditional logic field. Here you can see, that if the “Select Airport” field is equal to DMU means Dimapur Airport then the Dimapur Airport HTML field will be shown. Similarly, if the “Select Airport” field is equal to PNU means Pune International Airport then the Pune International Airport HTML field will be shown. Similarly, apply this condition to all airports.
by the way, I addressed the Dimapur Airport as DMU and Pune International Airport as PNU by adding value (DMU, PNU) in the airports list.
Now in the else area hide all the airport HTML fields which means when the user selects Airport the related HTML field will appear otherwise all fields will be hidden. Even when the user deselects the airport field the HTML field will automatically vanish.
Well, in the HTML field as you see I wrote something about cost per person and per child and carry weight per person. So you can add a payment form with this form builder. All you have to do is click the “+” icon, and a multi-step form will be generated instantly. You can add multi pages to a single contact form.
Now click on the update button and then the publish button. Here you will get a short code, just paste it into your contact page and then publish it. You will be able to see that form after publishing your contact page.
Well, that’s it. It is so simple as that. However, if you are a new user of the form builder plugin, you may face some problems while creating advanced forms using conditional logic. Don’t worry, Bit Form has a fantastic support team to help you all the time and documentation for easy understanding of everything related to the Form builder plugin.
Related Questions You May Ask
Can I use conditional logic for more than just showing/hiding fields?
Absolutely! Conditional logic can also change field values, send emails to different recipients based on user input, redirect users to different pages after form submission, and more.
Do I need to know coding to use conditional logic in WordPress forms?
While a basic understanding of logic (like “if this, then that”) is useful, the Bit Form plugin in WordPress provides a user-friendly interface, allowing you to set up conditions without touching any code.
Is it possible to combine multiple conditions?
Yes, the Bit Form plugin allows you to combine conditions. For example, if a user selects “Option A” and “Option B”, then show “Field X”. which I already have shown in this article.
Will using conditional logic slow down my website?
Generally, some plugins may affect your site’s speed. But the good news is that the WPHive tests show that Bit Form does very well with the amount of memory used and that impact on page speed when the plugin is active.
Can I test this Form Builder plugin for free?
Yes, you can test everything that Bit Form Pro has. You can use advanced conditional logic, repeater field, and signature field. You even can add a payment gatewayin this testing link. You can check out everything for free before purchasing Bit Form Pro.
Dear WordPress enthusiasts! What an unforgettable experience it was! WordCamp Dhaka 2025 is over, and wow, what an amazing event it was! From beginning to end, the energy, excitement, and community spirit were truly awesome. Bit Apps was proud to be part of this grand event as the Lalbagh Legacy (Platinum) Sponsor of WordCamp Dhaka […]
Black Friday 2025 is finally here, and it’s the best time to give your WordPress website the upgrade it deserves with huge discounts! If you’ve been thinking about improving your site’s design, automating tasks, or adding more functionality, this is the perfect opportunity. This Black Friday, you can grab amazing deals on the best plugins, themes, and automation […]
Convert site visitors into your customers by these latest WordPress chat plugins. Among them one WordPress chat widget plugin is special and very cheap. Try it.
Cookie Consent
We use cookies to improve your experience on our site. By using our site, you consent to cookies.
This website uses cookies
Websites store cookies to enhance functionality and personalise your experience. You can manage your preferences, but blocking some cookies may impact site performance and services.
Essential cookies enable basic functions and are necessary for the proper function of the website.
Name
Description
Duration
Cookie Preferences
This cookie is used to store the user's cookie consent preferences.
30 days
Cookie Preferences
This cookie is used to store the user's cookie consent preferences.
30 days
Cookie Preferences
This cookie is used to store the user's cookie consent preferences.
30 days
This cookie is set by Cloudflare to help manage bot traffic and protect the website from malicious activity. It does not collect or store any personal data and is used solely for security and performance purposes.
Contains information about the traffic source or campaign that directed user to the website. The cookie is set when the GA.js javascript is loaded and updated when data is sent to the Google Anaytics server
6 months after last activity
__utmv
Contains custom information set by the web developer via the _setCustomVar method in Google Analytics. This cookie is updated every time new data is sent to the Google Analytics server.
2 years after last activity
__utmx
Used to determine whether a user is included in an A / B or Multivariate test.
18 months
_ga
ID used to identify users
2 years
_gali
Used by Google Analytics to determine which links on a page are being clicked
30 seconds
_ga_
ID used to identify users
2 years
_gid
ID used to identify users for 24 hours after last activity
24 hours
_gat
Used to monitor number of Google Analytics server requests when using Google Tag Manager
1 minute
__utmt
Used to monitor number of Google Analytics server requests
10 minutes
__utmb
Used to distinguish new sessions and visits. This cookie is set when the GA.js javascript library is loaded and there is no existing __utmb cookie. The cookie is updated every time data is sent to the Google Analytics server.
30 minutes after last activity
__utmc
Used only with old Urchin versions of Google Analytics and not with GA.js. Was used to distinguish between new sessions and visits at the end of a session.
End of session (browser)
_gac_
Contains information related to marketing campaigns of the user. These are shared with Google AdWords / Google Ads when the Google Ads and Google Analytics accounts are linked together.
90 days
__utma
ID used to identify users and sessions
2 years after last activity
Clarity is a web analytics service that tracks and reports website traffic.