In the digital age, where interaction and accessibility are key to thriving online, having a contact form on your WordPress website is not just a convenience—it’s a necessity. Think of a contact form as a bridge, connecting the vast online world with your personal or professional space. It’s an essential tool that invites user engagement, opening up a direct line of communication between you and your visitors. By the way, the matter of concern is how to create and add a contact form in WordPress. Don’t worry I will show you the easiest way to create and add a contact form in your WordPress without any coding knowledge by using plugins like Bit Form.
Hey, don’t worry too much about the price. You will be shocked at how affordable this is when you see how many high-end features it has. There are over 40 advanced fields, such as a calculator, a signature field, a currency field, a country field, a check box field, and many more. You can also add three famous payment gateway fields (Paypal, RazorPay, Stripe, and Mollie) plus advanced conditional logic to make your form even more advanced.
Importance of having a contact form in WordPress
Whether you’re running a business, managing a blog, or showcasing a portfolio, a contact form serves as a welcoming gesture, encouraging visitors to reach out and connect. It’s not just about collecting emails or generating leads; it’s about building relationships and trust.
With a contact form, visitors can easily ask questions, request information, or provide feedback, all without the hassle of searching for an email address or picking up the phone. This ease of interaction not only enhances the user experience but also fosters a sense of community and accessibility around your website.
How to Create a Contact Form in WordPress
Before adding a contact form to your WordPress site, you have to create it first. Bit Form is simply a drag-and-drop form builder plugin for WordPress. Here, you can create a simple contact form to an advanced multi step form. 4 popular gateways, Paypal, Razorpay, Stripe, and Mollie, are available in the Bit Form, so you can create an advanced payment form using conditional logic, as Bit Form has advanced conditional logic with if, else if, and else conditions. a registration form or any form within a minute.
However, coming to the point. You have to follow four simple steps to create a contact form in WordPress.
Step 1 – Choose the Bit form plugin then install and activate it
You only need to follow two steps to install and enable the plugin. One way is to look for it right from the WordPress dashboard. Do what the directions say.
Instruction 1: Go to the WordPress dashboard > click on “Plugins” > then “Add New,” > Search “Bit Form” > Install > Finally, “Activate”.
Instruction 2: Once you’ve bought the plugin from the developer account, you need to download the file, upload it to your WordPress dashboard, and then click on the license to approve it.
Step 2 – Drag and drop any fields
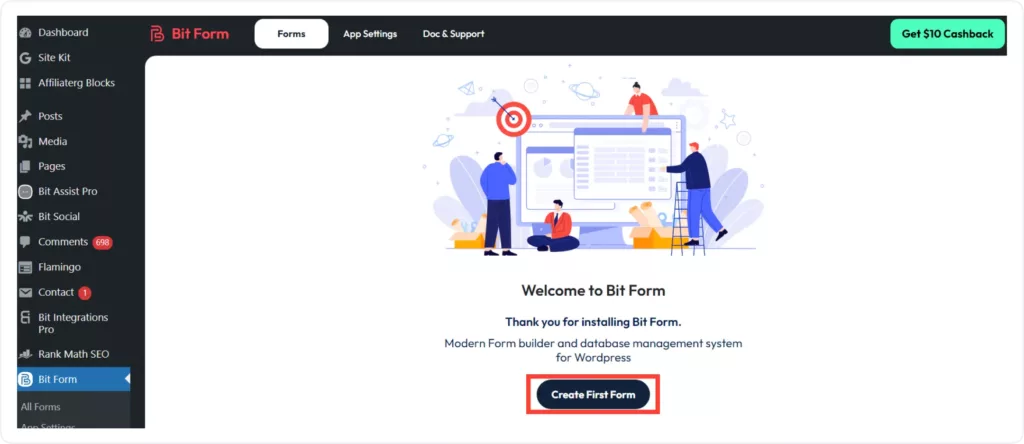
Now click on the Bit Form and then the “Create First Form” button.
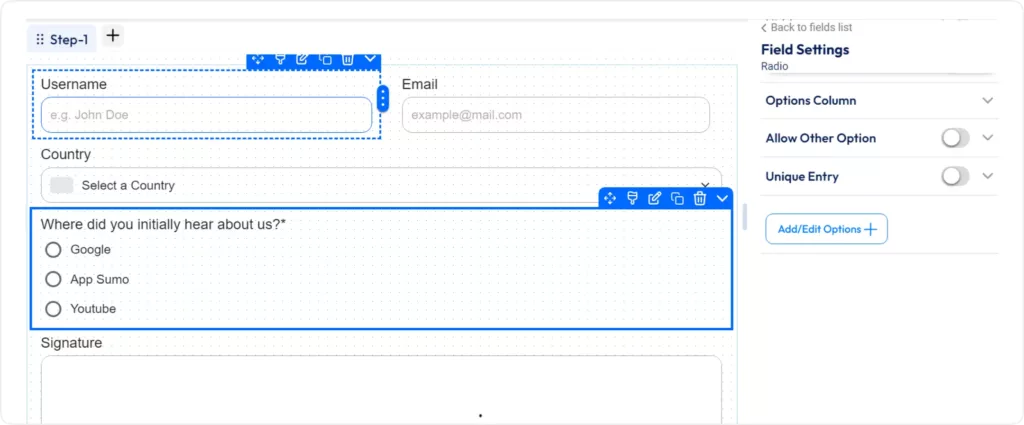
On the left side, you can see 40+ basic to advanced fields under the Builder tab. Just drag and drop any specific fields that you want in your contact form. Here, I drag and drop five fields, as you can see over there. From the country field, your users can choose a particular country, and at last, you can see the signature field, where your users can fill it out with their unique sign.
Step 3 – Edit the specific field by Field settings
Now it’s time to edit their label name and placeholder name, as well as add some options to the radio button. All you have to do is simply click on any specific field that you want to edit, and you will see a field settings option on the left side for this particular field. From there, you can add subtitles, helper text, and also set a custom error message for this specific field. Plus, you will get lots of advanced field settings options to make your field smarter.
By the way, since fields are moveable, you are free to move and adjust them as necessary.
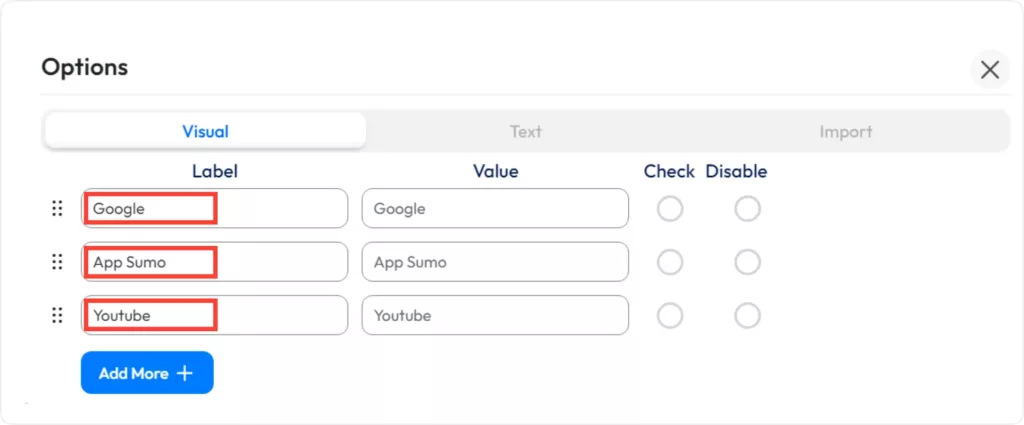
Now, you need to click on “Add/Edit Options” in order to add some options to the radio button. Simply click on it to change the name to what I’ve indicated in the picture.
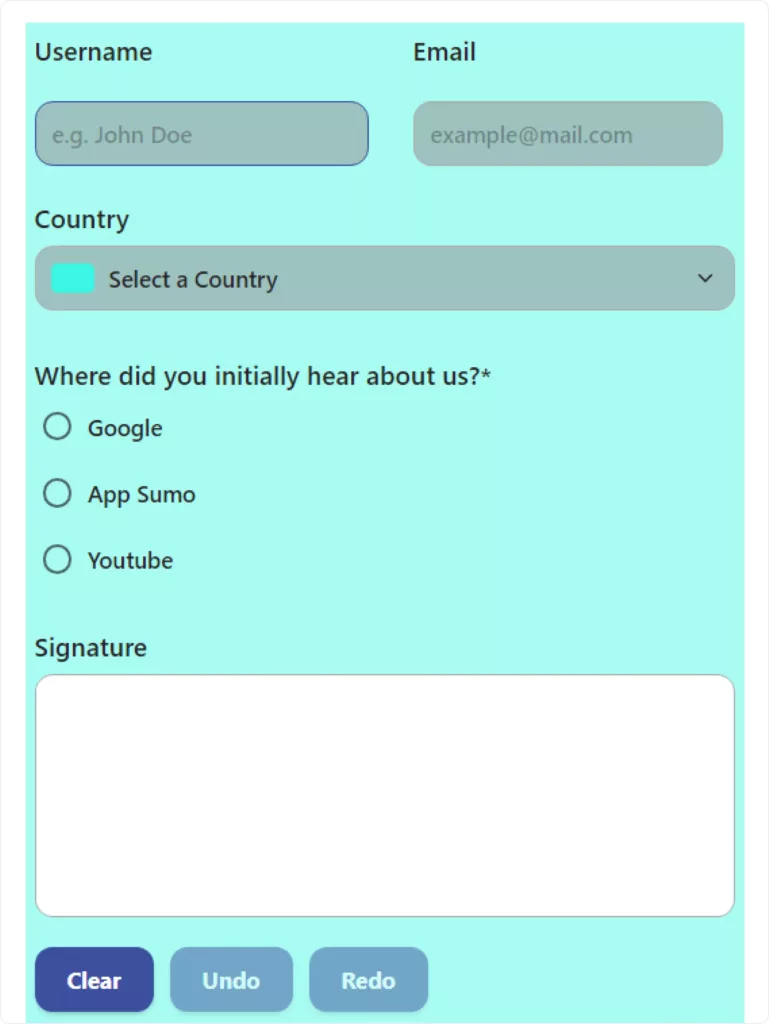
Once the name is entered into the radio button, a form similar to the one below appears. All the fields need to be edited in the same manner. Using Bit Form makes this incredibly simple.
That’s it; the form is now prepared to be added to your WordPress website. Well, fear not—I will demonstrate how to add this contact form to your WordPress website.
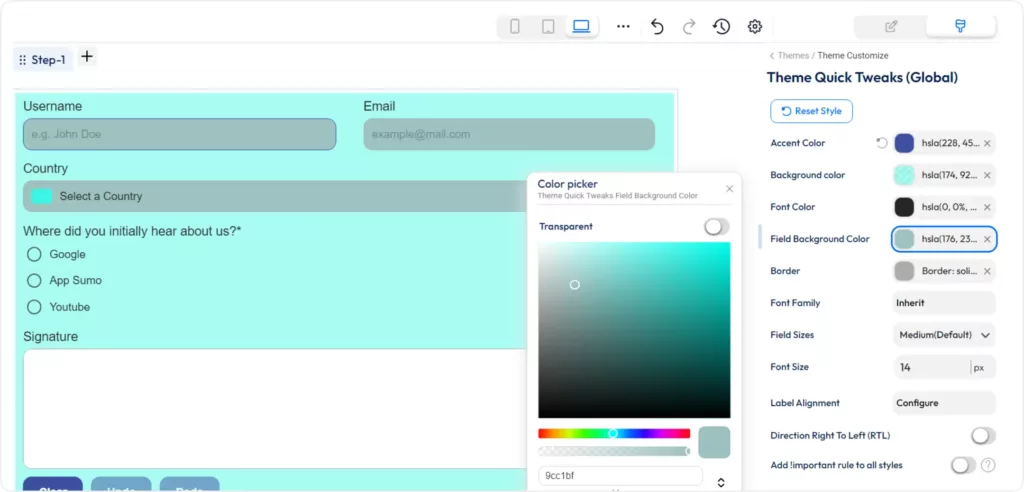
Step 4 – Edit the style of the fields
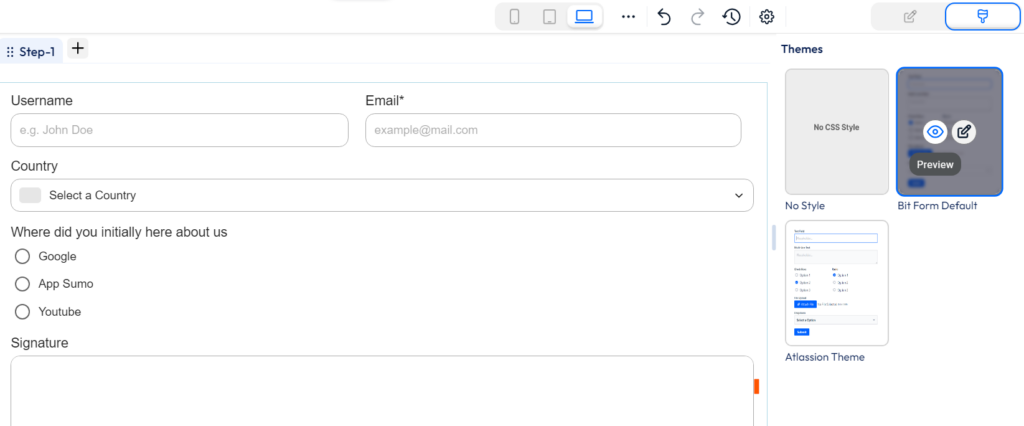
If you want to customize your contact form, you can do that. Bitform has incredible style options. Just go to the theme customization in the corner of the right side. Simply click on it.
To make your form stand out, you may alter its entire background, border, and font colors in addition to using a ton of other advanced options.
How to add a contact form in WordPress
Now it’s time to add this form to your WordPress contact page. Once you’ve created a form using a plugin such as Bit Form, you can incorporate it into your WordPress page using the shortcode the plugin provides. Simply insert the shortcode into the page where you want the form to appear. Follow the instructions, please.
Instructions 1: Copy the shortcode as I have shown you in the image.
Paste it into your WordPress contact page.
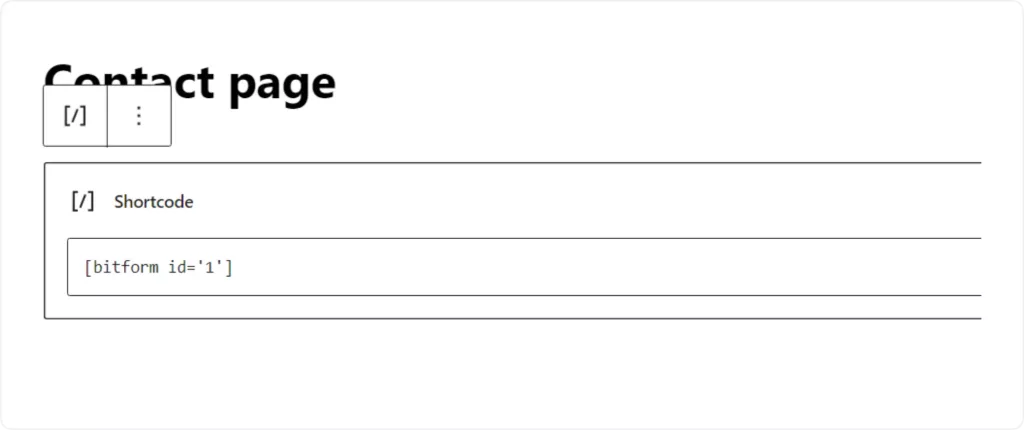
Instruction 2: Go to the WordPress dashboard > Contact page (that has already existed) > click on + sign > search and click the shortcode
Instruction 3: Paste the code here and publish or update the page.
Wrap up
Check out the appearance of your contact form. You can, however, change the form at any moment. Furthermore, you have the option to create a multi-step form if you think this one is a little too long. If you so choose, you may even create a conversational form; after all, conversational forms are known to increase lead generation. However, with the Bit Form plugin, you can construct a wide variety of forms. Be unconcerned about the cost. I promise that when you see the price, you’ll be taken aback.
You may also ask these questions
What is a contact form, and why is it important for a WordPress site?
A contact form allows site visitors to communicate with website owners without exposing an email address to spam. It’s essential for customer service, lead generation, and overall user engagement.
Is it possible to customize the look of my contact form to match my website?
Yes, with plugins like Bit Form, you can customize the appearance of your forms to match your website’s design. Bit Form offers various styling options that allow you to adjust fonts, colors, and layouts.
How do I prevent spam submissions in my contact form?
You can use features like CAPTCHA or honeypot fields provided by the Bit Form plugin to filter out automated spam submissions effectively.
Is there a way to track submissions from my contact form?
Yes, Bit Form provides an advanced logging system that allows you to track all activity related to your forms. Bit Form tracks form views, completion rates, and responses, letting you easily monitor performance and user engagement.
Many WordPress users need to change their admin email for different reasons. Sometimes you lose access to your old email. Sometimes it gets hacked. And when that happens, you stop receiving important emails, like password reset links, security alerts, or update notifications. That can be a big problem. Another common reason is switching to a […]
WPForms Lite users often face a common problem. The free version does not store form entries in the dashboard. Instead, it only sends submissions by email. This means you cannot view or manage entries inside WordPress. This setup can quickly become frustrating. Important emails may land in spam or get lost. Without upgrading to Pro, […]
AI is changing how WordPress websites create content and automate daily tasks. But many website owners still struggle to connect powerful AI tools without paying extra or dealing with complex setups. While many creators are still stuck in the “copy-paste” loop with AI tools, WordPress Gemini Plugin is revolutionizing how websites use artificial intelligence to […]
Cookie Consent
We use cookies to improve your experience on our site. By using our site, you consent to cookies.
This website uses cookies
Websites store cookies to enhance functionality and personalise your experience. You can manage your preferences, but blocking some cookies may impact site performance and services.
Essential cookies enable basic functions and are necessary for the proper function of the website.
Name
Description
Duration
Cookie Preferences
This cookie is used to store the user's cookie consent preferences.
30 days
Cookie Preferences
This cookie is used to store the user's cookie consent preferences.
30 days
Cookie Preferences
This cookie is used to store the user's cookie consent preferences.
30 days
This cookie is set by Cloudflare to help manage bot traffic and protect the website from malicious activity. It does not collect or store any personal data and is used solely for security and performance purposes.
Contains custom information set by the web developer via the _setCustomVar method in Google Analytics. This cookie is updated every time new data is sent to the Google Analytics server.
2 years after last activity
__utmx
Used to determine whether a user is included in an A / B or Multivariate test.
18 months
_ga
ID used to identify users
2 years
_gali
Used by Google Analytics to determine which links on a page are being clicked
30 seconds
_ga_
ID used to identify users
2 years
_gid
ID used to identify users for 24 hours after last activity
24 hours
_gat
Used to monitor number of Google Analytics server requests when using Google Tag Manager
1 minute
__utmt
Used to monitor number of Google Analytics server requests
10 minutes
__utmb
Used to distinguish new sessions and visits. This cookie is set when the GA.js javascript library is loaded and there is no existing __utmb cookie. The cookie is updated every time data is sent to the Google Analytics server.
30 minutes after last activity
__utmc
Used only with old Urchin versions of Google Analytics and not with GA.js. Was used to distinguish between new sessions and visits at the end of a session.
End of session (browser)
__utmz
Contains information about the traffic source or campaign that directed user to the website. The cookie is set when the GA.js javascript is loaded and updated when data is sent to the Google Anaytics server
6 months after last activity
_gac_
Contains information related to marketing campaigns of the user. These are shared with Google AdWords / Google Ads when the Google Ads and Google Analytics accounts are linked together.
90 days
__utma
ID used to identify users and sessions
2 years after last activity
Clarity is a web analytics service that tracks and reports website traffic.